
Can you imagine adorable hand-made ribbon roses nestled in a pretty gift box wrapped with matching ribbon and a Bowdabra bow? I can! Roses are the perfect gift for all occasions, including birthdays, anniversaries, holidays, weddings, and just about any occasion! And the easy-to-make roses from wire-edged ribbon are perfect for gift boxes because you can easily shape, fluff, and secure the petals using a pull wire technique. Sounds cool, doesn’t it? Here’s how:

Tie a knot, leaving about an inch on one end of the ribbon.

.jpg)
As you’re pulling the wire, gently push the ribbon toward the opposite end. Use the barrel of a pen to wrap the excess wire around it as you’re creating the ruffle.

Once the ribbon is gathered, remove the pen and…

Begin wrapping the ribbon around to create the center bud.

Continue wrapping the gathered ribbon around the center to form the rest of the rose, using the exposed wire to secure . . .

the rose . . .

at the bottom. Make several more to fit inside the gift box.

Measure and cut a piece of styrofoam to fit the gift box and secure it inside.


secure the roses into the styrofoam . . .


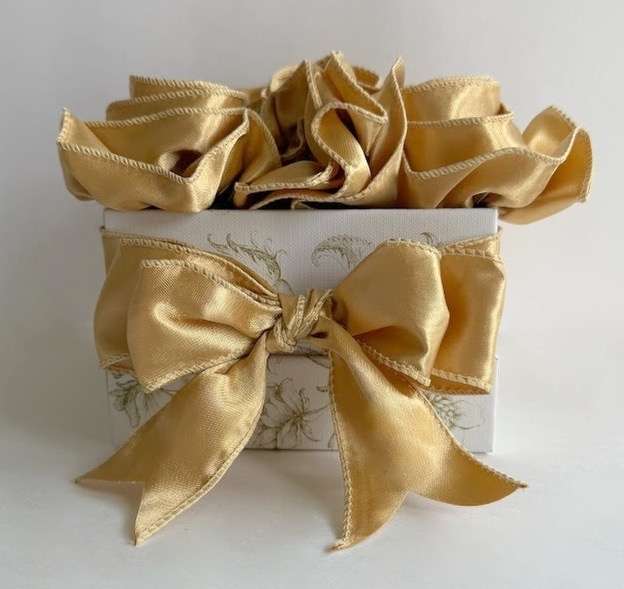
arranging them in a beautiful bouquet inside the decorative gift box.

Once all the ribbon roses are secured in the gift box, tie a strip of ribbon around the gift box. Dovetail the ends by folding each end together and cutting at an angle from the corner end over to the opposite fold at an angle.

Now, it’s time to make an adorable Bowdabra bow using the Mini Bowdabra!


On the opposite side, fold over the ribbon about 2″, creating a matching loop, gathering the ribbon down into the Mini Bowdabra.

Next, make another loop, folding over about 1.5 inches, gathering the ribbon down into the Mini Bowdabra and making another 1.5″ loop on the opposite side for a total of four loops (two on each side).

Use the Mini Bowdabra wand to crunch down the bow and to cut off excess ribbon.

While the bow is still in the Mini Bowdabra, thread the two loose ends of the Bowdabra Bow Wire through the loop at the other end, pulling the bow wire tightly and gently pulling the bow out.

Take the bow wire around to the back, tying in a couple of knots and cutting off excess bow wire.

To attach bow to the gift box, untie the ribbon knot on the gift box and place the Bowdabra Bow in the center, tying the bow tightly in the center together with the dovetail ends.


Hi everyone! Catharine from Pretty Palace Porches here! In this

It’s Christmas in July, and today, Bowdabra creator, Sandy Sandler,

Hi everyone! Joette from the Bowdabra Design Team here! In

Celebrate Fourth of July with these patriotic clothespin stars. Use

In this easy DIY video, Bowdabra® creator, Sandy Sandler, shows

Sandy Sandler, the creator of the Bowdabra, is here to