.jpg)
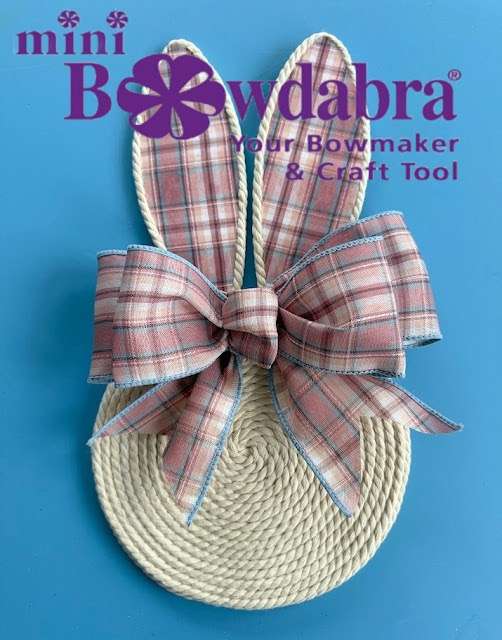
Looking for a quick and adorable spring or Easter project? You can transform foam board into a cozy, shabby chic piece that’s as unique as it is cute! This cord-wrapped bunny head wall hanging is the perfect DIY craft using cording and ribbon accents that includes the cutest Mini Bowdabra bow!
Materials:

and cut out using a craft knife.

Next, place hot glue in the center of the round foam board and . . .

begin wrapping cord around the foam board . . .

adding hot glue as you wrap until . . .

The circle foam board is completely wrapped and covered, including the edge.


Then, using a craft knife to cut out.


The bunny ears will match.

Once the ribbon is glued on, begin adding glue along the side edges to glue on the cording and let it dry.

Once the cording is dry, glue on the ears to the bunny head.

While the bunny ears are drying, let’s make an adorable bow using the Mini Bowdabra!


Next, pinch the end of the ribbon on the roll, placing it down into the Mini Bowdabra.


On the opposite side, fold over the ribbon at the 3″ mark, creating another loop, gathering the ribbon down into the Mini Bowdabra.

Next, make another loop, folding over at the 2.5″ mark, gathering the ribbon down into the Mini Bowdabra and . . .

making another 2.5″ loop on the opposite side for a total of four loops (two on each side)

Use the Mini Bowdabra wand to crunch down the bow, using scissors to cut off the excess ribbon.

Leave about two inches of ribbon for the finish center, and crunch down the bow again to cut off the excess ribbon.


Then adjust the center ribbon fabric into a decorative knot.

Attach the bow to the top of the bunny head and in between the ears using hot glue, and then once dry, fluff the bow for a gorgeous look!

")
Teachers adore practical gifts, but they also love something that

I’m Joette from the Bowdabra Design Team. In this tutorial,

In this easy DIY tutorial, Sandy Sandler, Bowdabra creator, shows

Hi everyone! It’s Joette from the Bowdabra® Design Team! Today,

Hey everyone! It’s Christmas in July and a great time

Hi everyone! I’m Joette with the Bowdabra® Design Team, and