Napkin Collage Tile Holiday Coasters

Napkin Collage Tiles to Make the Perfect Festive Holiday Coasters

Looking for a fun, affordable, and personalized gift idea or a festive addition to your own home décor this holiday season? Look no further than DIY Holiday Napkin Tile Coasters! This simple craft uses the magic of Mod Podge, basic white ceramic tiles, and patterned paper napkins to create stunning, durable coasters.Napkin Collage Tile Holiday Coasters

Gather these materials:

  • 4″ x 4″ white ceramic tiles: These are inexpensive and can be found at most hardware or craft stores.
  • Paper napkins with a holiday print: Choose festive patterns! Look for ones with all over designs.
  • Dishwasher-safe Mod Podge: This is an all-in-one adhesive, sealer, and finish. Although there are several varieties of Mod Podge, the dishwasher-safe variety is recommended for coasters.
  • Soft bristle artist brushes: One round brush and one flat brush for trimming napkin motifs and applying the Mod Podge.
  • Scissors or craft knife: For trimming the napkins.
  • Felt or cork pads (optional): To attach to the bottom of the tiles to protect surfaces.

Let’s make a napkin collage holiday coaster:

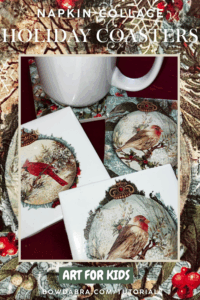
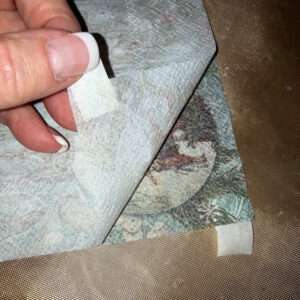
This process is straightforward, but patience and a light touch are key to a beautiful finish.

1. Prepare Your Napkins: Paper napkins are typically made of two or three thin layers (plies). You only want the top printed layer. Carefully separate the layers, peeling the blank plies away from the printed design. You’ll be left with a thin, translucent layer of paper with the design printed on it. This is easily accomplished by placing a small strip of masking tape on the outside and inside layer of the napkin, and gently pulling apart. Repeat this process until you are left with only the single printed napkin layer.Separate Layers of Napkin

2. Cut the Napkin Design: Trimming the napkin to size or working with a single motif is done by dipping the round brush in water, then tracing around the area on the napkin you want to work with. Next, gently tear the napkin along the water line that you traced. This method leaves you with a lovely feathered edge. Trace Water Line to Trim Napkin to Selected Area

  • Full coverage: Lay the single ply of the napkin over your 4″ x 4″ tile. Move the napkin around until the design area you want is in place. Mark a water line (as described above) on the napkin slightly larger than the tile. You can trim the excess later with a craft knife once the Mod Podge is dry.
  • Single motif: If you want a specific motif (like a snowman or a poinsettia), edge around it leaving a small border and using the same water line technique. The white of the tile will serve as a background around your design.

3. Apply the Base Coat: Using the flat brush, apply a thin, even coat of Mod Podge to the entire top surface of the ceramic tile. Make sure the coat is not too thick, but covers the tile completely.Coat Tile with Mod Podge

4. Placing the Napkin: Press the flat side of the brush onto the center of your selected napkin piece, and gently place onto the wet Mod Podge. Start in the center, and lightly brush outwards to the edges, smoothing the napkin as you go. Work slowly and gently. Lift Napkin Motif with Flat Side of Brush

5. Seal and Finish: Let the base coat and napkin dry completely for about 1-2 hours. Once dry, apply a second, thin, even layer of Mod Podge over the top of the napkin design and tile surface. This seals the napkin and acts as a protective finish.

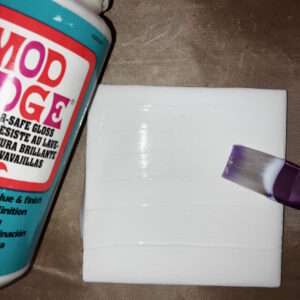
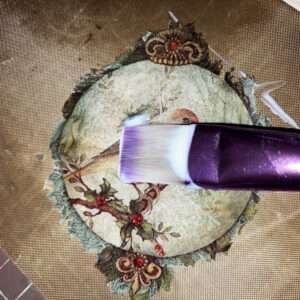
Let this second coat dry completely. For added durability and water resistance, you can apply 2-3 additional topcoats, allowing each one to dry fully before applying the next. 

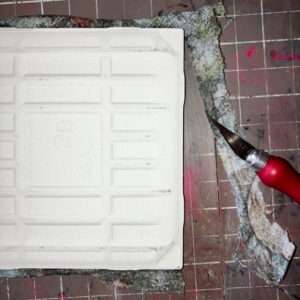
At this point, while the Mod Podge will be dry to the touch it takes 28 days for the product to fully cure and be top-rack dishwasher safe. Treat your new coasters gently until the full cure time has passed for maximum durability.

6. Final Touches

  • Trim Edges: If you opted for a full-coverage design, once the Mod Podge is fully cured (usually 24 hours) carefully trim any excess napkin from the tile using a craft knife.Trim Excess from Tile Edges
  • Protect Surfaces (Recommended): Glue small felt or cork pads to the four corners on the underside of the tile. This prevents the ceramic from scratching furniture.

And that’s it! You’ve just created beautiful, personalized, and functional holiday coasters. Wrap them up with a ribbon for a thoughtful gift, or place them under your own eggnog this season!Napkin Collage Tile Holiday Coasters (Instagram)

Napkin Collage Tile Holiday Coasters

Hi there! I’m Lisa from The Rustic Vine, part of

Sandy Sandler shows you the step-by-step process of making an

Hi everyone! I’m Joette from the Bowdabra Design Team, and

Elevate your holiday décor with Nick’s Beautiful Three Ribbon Bow!

Want to dress up your gift packages this year? Watch

Hi everyone! I’m Joette from the Bowdabra Design Team, and