How to make adorable goody basket table favors

 goody basket table favors

Here’s a fun and easy way to turn recycled plastic cups into adorable goody basket table favors with ribbon and bow! Handmade goody baskets that double as beautiful table favors you can easily make yourself! And the best part, any occasion is a good reason to make them! So let’s get started!

Supplies:
How to:
First, using a box cutter, cut off the top area of the plastic cup where the indentations are. 

Then cut off the top ring which will become the handle.

Now think of a clock, and lightly make marks on the cup top with a marker in the 12, 6, 3, 9, positions first, then in between for a total of eight marks.
Start at the noon position and add a diagonal line of quick-hold glue – 

Now, place a strip of 3/8″ ribbon over the glue and smooth the ribbon out.

Continue adding glue on all the top marks equally on the diagonal to add the strips of ribbon. Once all the ribbon strips are dry, cut off the excess ribbon ends on the top and bottom.

Next, run a line of glue from the top of a ribbon strip down across the strip to the left to the bottom of the next strip.  Apply a ribbon strip on top of the glue for a criss-cross look.  Do this for all the eight strips of ribbon.
   
 Be sure to cut off excess ribbon ends on top and bottom

Finish the look by gluing on strips of ribbon around the top of the plastic cup  .  . .

and around the bottom.

Next, attach the handle by cutting open the plastic ring and applying glue to the inside of the cup at the 3 and 9 marks.

Use clamps to hold the ends of the handle in place until dry.
 goody basket table favors
To add a decorative bow
Cut an 18″ piece of Bowdabra bow wire, and fold it in half. Lay the folded bow wire in the Mini Bowdabra, tucking the loop and ends under. Take an 8″ strip of 1.5″ ribbon, pinching the ribbon in the middle. . .
 
inserting it down into the Mini Bowdabra for the bow tails.
Leave the ribbon on the roll pinch the end and place it down into the Mini Bowdabra. Then fold over the ribbon making a 2″ loop, twisting the ribbon down into the Mini Bowdabra. 
       

Then, fold over the ribbon creating a 2″ loop, twisting the ribbon down into the Mini Bowdabra on the opposite side.

Use the Mini Bowdabra wand to scrunch down the center of the bow and cut off excess ribbon.   
                                       
While the bow is still in the Mini Bowdabra, thread the two loose ends of the bow wire through the loop, pulling tightly while gently pulling the bow out. Tie bow wire around to the back cutting off excess wire. Then fluff and straighten the bow!

 Dovetail the ends by folding the ends together and cutting at an angle from the fold down to the opposite end.

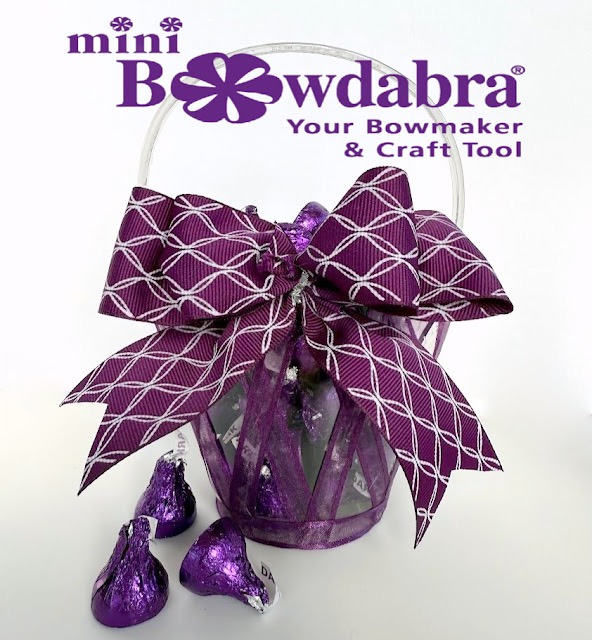
Attach the gorgeous bow to the top center of the goody basket table favors using quick dry glue.  Have fun creating beautiful goody basket table favors filled with small treats or gifts.


 goody basket table favors
For more creative designs by Bowdabra designer, Gail Griffen please visit her blog at Purple Hues and me. 


Hi there! I’m Lisa from The Rustic Vine, part of

Sandy Sandler shows you the step-by-step process of making an

Hi everyone! I’m Joette from the Bowdabra Design Team, and

Elevate your holiday décor with Nick’s Beautiful Three Ribbon Bow!

Want to dress up your gift packages this year? Watch

Hi everyone! I’m Joette from the Bowdabra Design Team, and