How to make an adorable ribbon tree bow ornament

ribbon tree bow ornament
Hi! This is Gail from Purple Hues and Me and the Bowdabra Design Team showing you how to make an adorable ribbon tree bow ornament! It’s a fun and easy to make, especially when adding an adorable Bowdabra bow as a topper! So let’s get started!
 
Supplies:  

How to:

Let’s begin by cutting out square ribbon pieces the width of the ribbon. This ribbon is 3.5 inches wide…

So measure 3.5 inches in length and cut out.

For this ornament, cut out 20 squares. Eight cones for the 1st row, six cones for the second row and six cones for the 3rd row. You can change the number of cones for each row depending on the size of the ribbon tree ornament you want.


Next, grab the opposite corners of the square and curve them around to the back in a cone shape .  .  .


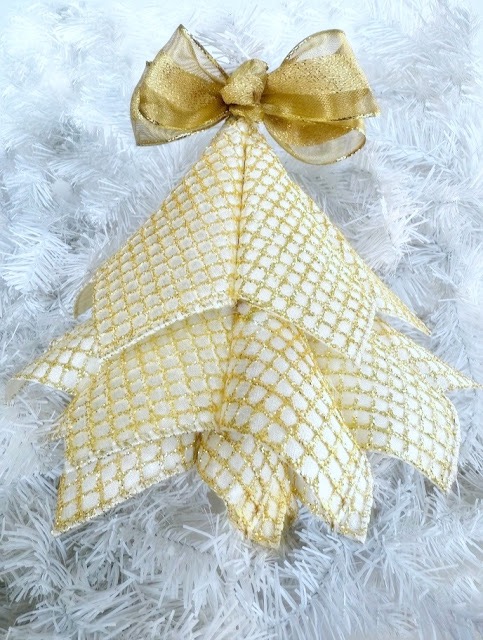
with a point at the top and a “V” shape flair at the bottom.


Glue along the back edge with hot glue .  .  .


and curve into a cone shape to seal the edge.


 To connect the cones, apply hot glue between the cones at the bottom sides, matching edges and applying glue midway up…

grouping the cones. Use clothespins to hold cones together. Don’t glue the top points together just yet.


Next, cut out a 12-inch piece of twisted cord .  .  .


and fold in half. Tie in a knot, making a top loop for hanging.
Insert looped twisted cord into first row of cones, adjusting position just above the ends of the cord. Add glue around the cord and press the cone points together onto the cord.
ribbon tree bow ornament

Add a second row above the first row, staggering cones, following the previous steps.


ribbon tree bow ornament
And finally, glue on the third row just below the knot.

How to Make an Adorable Bowdabra Bow Topper:

Cut an 18″ piece of Bowdabra bow wire, folding it in half and placing it down into the Mini Bowdabra, tucking ends under.  Leave the ribbon on the spool, pinch the end of the ribbon and insert down into the Mini Bowdabra. 
Then create a loop by folding over the ribbon a little over 2 inches, creasing the ribbon down into the Mini Bowdabra. 
On the opposite side, fold over the ribbon a little over 2 inches again, creating another loop, pinching the ribbon down into the Mini Bowdabra. Make one more loop, as before, down into the Mini Bowdabra and use the Mini Bowdabra wand to crunch down the bow.

Make another for a total of four loops – two on each side. To finish the bow, make a button loop to cover the bow wire. Use the Mini Bowdabra wand to crunch down the bow and to cut off the excess ribbon.


While the bow is still in the Mini Bowdabra, thread the two loose ends of the bow wire through the loop, pulling tightly while gently pulling the bow out.


Separate the two loose ends of the bow wire and bring them around to the back of the bow and knot twice to secure.
   

Finishing your ornament:

Fluff bow and .  .  .

tie on the cord just below the knot.


ribbon tree bow ornament
How gorgeous does this Ribbon Tree Bow Ornament look!
ribbon tree bow ornament

Make a perfect DIY winter wreath bow with the Bowdabra®—plus

    Hi there! I’m Lisa from The Rustic Vine,

Valentine’s Day is the perfect time to spread love, kindness,

  Create a stylish Funky Bow with Nick of Nick’s

Create a beautiful Winter Wonderland wreath with a big, fluffy,

  Hi everyone! I’m Joette from the Bowdabra Design Team,