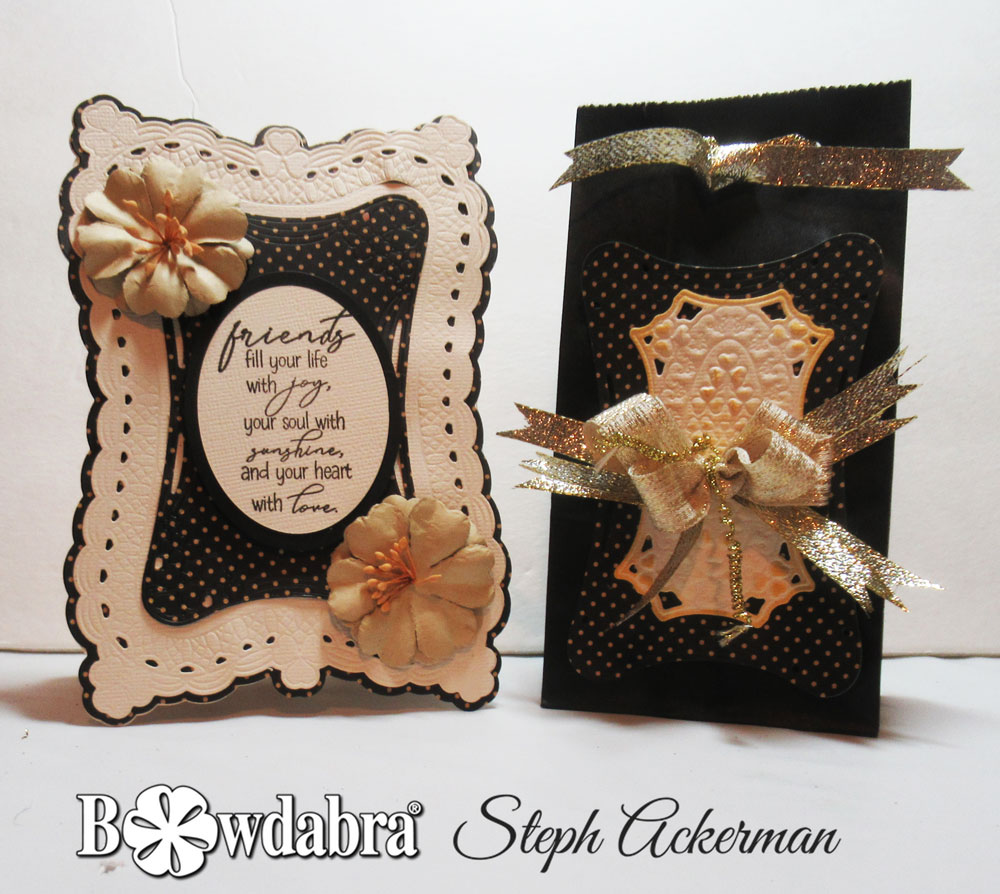
Hi everyone, Steph Ackerman here sharing how to create a stunning gift bag bow with a coordinating card. Perfect for graduations, weddings and more!

Bowdabra Mini
Bowdabra Hair Bow Tool and Ruler Kit
Bowdabra Bow Wire
Ribbon
Flowers
Die cuts
Pattern paper

First, cut a piece of Bowdabra bow wire. Then, fold it in half and insert it into the Bowdabra. You will have a loop on one side and two loose wires on the other side. This will serve as your slipknot. Tuck the ends under to stay out of the way while you are making your bow.
Next, place the hair bow tool and ruler on top.
Now cut 4 lengths of ribbon, each approximately 6″ in length.
Place the ribbon strips in the Bowdabra.
Dovetail the ends. To dovetail, fold the ribbon in half and cut at an angle away from the fold.

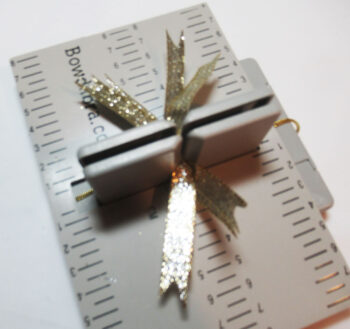
Next, place the striped ribbon in the channel and start creating loops.
Use the ruler to keep the loops the same size.

Continue making the same-sized loops until there are 3 per side.
Use the Bowdabra bow wand to push the loops into the channel.


Once everything is scrunched down with the Bowdabra bow wand, insert the loose wires through the loop and pull tight while the bow is still in the Bowdabra.

Then, remove the bow from the Bowdabra, separate the ends, turn to the back, and tie a knot.

Create the focal element for the gift bag using cardstock, pattern paper and die cuts.
Poking holes in the panel, feed the bow wire from front to back.
Then poke additional holes in the panel and feed the bow wire from back to front.

Use the bow wire to tie the bow to the panel.
Using a craft pick, twirl the remaining bow wire.

Adhere the focal panel to the gift bag.
Slip a small gift or gift card into the gift bag.
Punch holes in the top, thread the ribbon through, and tie off.
Using the same papers, create a coordinating card.
Add flowers and a sentiment to the card.
Thanks for stopping by.
Steph

Hi everyone! I’m Joette from the Bowdabra Design Team, and

Amanda from Whimsey Wreath Design Co., LLC, and the Bowdabra

Learn how to easily create a beautiful lemon lantern

Hi everyone, Steph Ackerman here to share Caramel’s Bunny Ears

Celebrate St. Patrick’s Day with a delightful handmade pin that’s

Amanda from Whimsey Wreath Design Co., LLC, and the Bowdabra