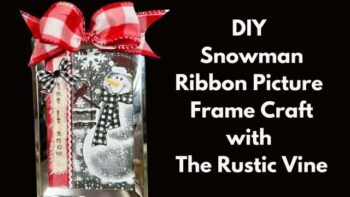
In this fun tutorial, Lisa from The Rustic Vine will guide you through making a stunning DIY Snowman Ribbon decor frame. It’s a simple yet creative project that adds a personal touch to your decor. Grab your materials, and let’s dive into crafting!
4 x 6 picture frame
Red and white gingham Bowdabra ribbon
Small pieces of fabric and stamps for tag
Piece of ribbon for the bow to use on the tag
Small piece of white Rick rack ribbon
Alene’s tacky glue
Hot glue

First, remove the backing from an inexpensive Dollar store frame. Next, spread some tacky glue all over and adhere strip of snowman print ribbon. Add a piece of red and white gingham ribbon right beside the snowman.
Glue on some white rickrack between both ribbons. Attach a sign that says “Let it snow” on the gingham ribbon and finish with a tiny bow. Glue the backing to the frame.
First, fold a piece of decorative cord in half and place it in the Mini Bowdabra. This will become your slip knot. Now, begin adding ribbon to make a loop on each side. Thread the loose cord through the loop and pull tight. Remove from the Bowdabra, turn to the back, and tie a knot.
To finish, fluff up the bow and glue it to the top of the snowman ribbon decor frame.
Please like us on Facebook. Each Monday at 4:00 p.m. PST, 5:00 p.m. MST, 6:00 p.m. CST, and 7:00 p.m. EST, Bowdabra hosts Facebook live. There are always several projects you can follow along and make with Sandy Sandler or one of our creative designers. Every week one lucky viewer will win a free roll of ribbon!
