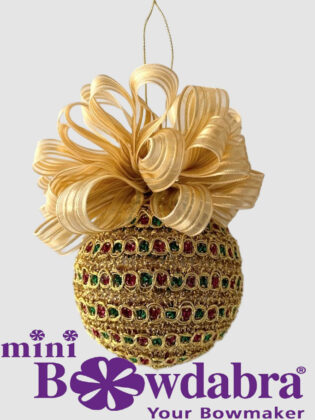
Find the center of the styrofoam ball and add a dab of glue there. Use the end of the scissors to press the ribbon knot down into the ball . . .
for the hanger.
Next, apply a generous amount of glue around the base of the hanger and begin placing the trim down following the bottom of the hanger, making sure the edge in the design is as close to the hanger as possible.
Continue applying glue around the ball and then add the trim, making sure the trim is as close to the edge of the previous row.
Continue wrapping the trim around the ball after applying glue . . .
being very careful with the placement of the trim as the area gets smaller and smaller. You’ll have to tighten it up a bit!
To finish, squish together the end of the trim in a circle while gluing it down, and then cutting off the excess.
To complete the ornament, let’s add a beautiful Bowdabra loopy bow to the top!
Here’s How:
Using a Mini Bowdabra, insert an 18″ piece of bow wire folded in half into the Mini Bowdabra, tucking ends under. Then, crease the end of the ribbon and place it into the Mini Bowdabra. Fold the ribbon at the 2″ mark and press into the Mini Bowdabra. This is your first loop.
Next, fold the other side at the same 2″ loop width.
Continue folding loops one side at a time down through the center of the Mini Bowdabra, creating 15 loops on each side for a total of 30 loops. Cut off the excess ribbon.
Scrunch down the loops with the Mini Bowdabra Wand.
While the bow is still in the Mini Bowdabra, thread the two loose ends of the bow wire through the loop at the other end pulling tightly, tie in a knot, and gently pull the bow out.
Then take the bow wires around to the back tying in a couple of tight knots.
Tie the bow onto the hanger with the bow wire adjusting the wire through the center of the bow. Make a loop with the two wires for hanging, tying the ends together into a knot, and cutting off excess wire. And finally, fluff the bow, arrange the loops, and stand back and admire your beautiful creation!
Perfect to make for Christmas in July!
