
Get ready for summer’s patriotic celebrations with this easy-to-make star garland. It’s perfect for all sorts of decorating indoors and out—as long as it’s not raining :)

You’ll need these supplies for the garland: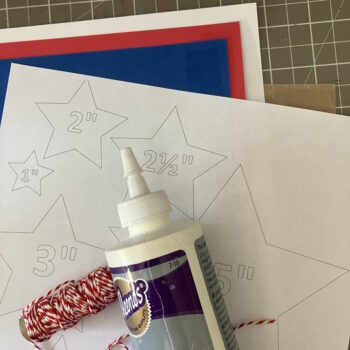

- Red, white, and blue cardstock
- Twine, narrow ribbon, yarn, string, or embroidery floss
- Quick drying liquid adhesive
- Star garland templates
Let’s make the patriotic star garland:
- Print the Star templates. Cut out the star sizes of your choice. The template includes 1″ to 5″ stars. Trace the templates onto the cardstock.

- Select two stars of the same size. Spread a line of liquid adhesive on the back of one star, and position the twine on the line of glue, leaving an 8″ to 10 tail before the star.

- Add dots of glue to the star points.

- Glue the second star on top of the first, encasing the twine between them.

- Continue building the garland. When your garland is the desired length, cut the twine, leaving an 8″ to 10 tail.

- Optionally, you can take your garland to the next level by layering colors and sizes of stars.

- Enjoy decorating with your patriotic garland.

Hey, kids be sure to visit The Bowdabra blog every Friday for another new kid-friendly craft or art project. See you there!!