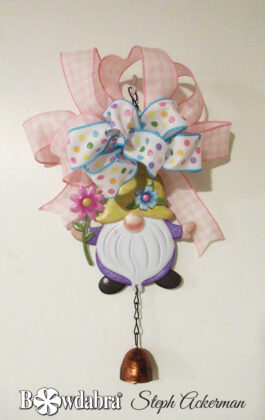
Hi everyone, Steph Ackerman here sharing a happy Bowdabra Gnome wall hanging. This little guy is a perfect decor piece throughout spring and summer. You can make it in minutes so why not make an extra one for a gift?

Supplies:
Bowdabra Bow-Making Tool
Bow Wire
Wired Ribbons
Gnome Wallhanging

First, cut a piece of Bowdabra bow wire, fold it in half, and place it in the Bowdabra.
Tuck the ends underneath while making the bow.

Starting with the pink checked ribbon, create loops, folding and twisting the ribbon as it passes through the channel.

Cut off the checked ribbon.
Place the dot ribbon in the channel, placing the end in the channel so as not to create an extra set of tails.

Create graduating smaller sizes of loops with the dotted ribbon.
Now, scrunch everything down with the Bowdabra wand.
Cut the dot ribbon, and fold it over to create the final loop.
Pull the wire through the loop and tighten it while the bow is still in the Bowdabra.
Next, remove the bow from the Bowdabra, separate the wire ends, and tie a knot.
Realign the bow and fluff out the loops.
Use the excess bow wire to tie the bow to the gnome wall hanging.
Add a metal word as a finishing touch.
Cute, isn’t he?
Thanks for stopping by.
Step
For more quick and easy DIY tutorials like this adorable gnome wall hanging visit the Bowdabra blog each week. And be sure and like us on Facebook. Join us on Mondays at 4:00 p.m. PST, 5:00 p.m. MST, 6:00 p.m. CST, and 7:00 p.m. EST, Bowdabra creator, Sandy Sandler or one of our creative design team members hosts Facebook live. There is always something new to make and we take you through the quick and easy steps for several projects. In addition, one lucky viewer will receive a free roll of ribbon!