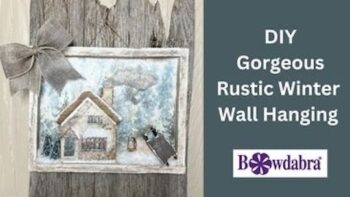
Hi, I’m Brandy, and I’m from A Rustic Stitch for the Bowdabra Design Team. Today, I’m really excited to share an amazing DIY Cozy Cottage craft with you. It’s all about making a cozy winter wall hanging with a rustic feel.
Don’t worry if you’re not an expert at crafting because I’ll guide you through each step. This project is perfect for adding a warm and cozy touch to your home during the winter season. So, gather your crafting supplies, and let’s dive into this awesome creation that will impress your friends and family.

How to make a cozy winter wall hanging
Materials:
8×10 canvas
House table decoration
Mini cedar trees
Birchwood log
Mini sled
Cotton Balls
Printable from myweeabode.com
Burlap ribbon for bow
White and Mineral chalk paint
Classic Caramel acrylic paint
Bowdabra Bow Wire or Twine
Mini Bowdabra
Instructions:
First, staple all around the front of the canvas. Next, remove all the staples from the back of the canvas. Now, peel back the canvas and using an Xacto, cut all the excess canvas off neatly.
Next, using white paint, brush a coat of paint all around the wood pieces and the front of your canvas. (which was the back) Paint the mini house as well.
Now, place the house on the winter printable and use it as a pattern to cut out the printable house. Use some ModPodge to attach the printable piece to the house cut-out. Let dry. Brush on another layer of ModPodge and when dry sand all around the edges for a clean finish.
Tear off pieces of the background from the printable and line them up to fit on your wall hanging. Use some more ModPodge to layer them on your frame.
Next, attach the house cut-out with some glue. Use some distressing ink all around the house cut-out.
Now, dry brush some caramel color acrylic paint followed by the mineral color all around the white frame. Paint the mini wooden sled with mineral color paint as well adding some white to resemble snow.
Then, use a cotton ball at the chimney area for a smoky effect and at the bottom to resemble snow. Attach the cotton ball with glue adding a mini tree to complete the 3-D look. Finally, glue on a mini wood log and the sled. Accent all around with white chalk paint.
Make the bow:
Cut a piece of twine, fold it in half, and lay it in the Mini Bowdabra.
Next, Use the burlap ribbon to create a small bow, making loops on both sides. Thread the loose twine ends through the loop and pull tight. Remove it from the Mini Bowdabra and tie a knot and a double knot. Cut off any excess wire. Glue or staple the bow to the bottom of your cozy winter wall hanging!
For more of Bowdbara designer Brandy’s designs and tutorials please visit her at A Rustic Stitch and her YouTube channel.
And for more amazing Mini Bowdabra videos and tutorials visit the Bowdabra YouTube channel.