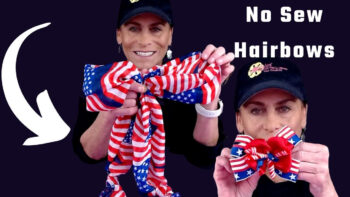
Adding a personal touch to your accessories is always a fun and rewarding experience. Today, we’re showcasing how to create two stunning hair bows using the Bowdabra Bow maker. Whether you’re a crafting novice or a DIY expert, this guide will make the process a breeze.
Materials for mini hair bow
Red ribbon
Ribbon-covered alligator clip
Materials for large hair bow
Large Bowdabra
Bowdabra bow wire
Bead
Patriotic scarf from dollar tree
Ponytail holder
Step-by-step Instructions for mini hair bow:
First, fold your Bowdabra bow wire in half and lay it into your Mini Bowdabra. Tuck the ends underneath to keep them out of your way
Find the center and place it right side of the ribbon making sure the stars are at the top and place down into the Bowdabra. Next, take one end of the ribbon bring it over and scrunch that right side down into the Bowdabra. Then, bring the other end over the first loop which forms a sort of X shape and lay that in the Bowdabra. Now, push the lower ribbon in first, then push the top one and you have a boutique bow.
Repeat the same process with a piece of red ribbon. Now, add the Korker ribbon in the Mini Bowdabra. Thread the wires through the loop and pull tight while the bow is still in the Bowdabra. Remove from the Bowdabra, separate the ends, bring them around to the back, and tie a secure double knot.
Finally, attach your completed bow to the alligator clip pre-covered in red ribbon. Do this by threading the bow’s wire through the clip, tying a knot, and clipping the excess wire.
Large hair bow instructions:
Start by folding your Bowdabra bow wire in half and threading it through a bead. Tuck one side underneath and put it aside.
Next, Take your patriotic scarf and fold it over into thirds. Place the side without the fold down through the center of the Large Bowdabra, leaving a tail. Repeat the process, ensuring your two loops are the same size
Now, Tie a knot at the bottom of your bow for a polished look. Then, pull your bow wire through the slip knot, pulling it tight as you remove it from the Bowdabra. Separate the ends to position the bead at the center of your bow.
Lastly, attach your bow to the blue ponytail holder by knotting it twice, then clip the excess wire and shape out your bow.
Congratulations, you’ve just created two stunning hair bows. These DIY hair bows are the perfect additions to any hairstyle and also make fantastic gifts. Stay tuned for more crafting tutorials, and don’t forget to follow us on YouTube and Facebook for more. Happy crafting!
