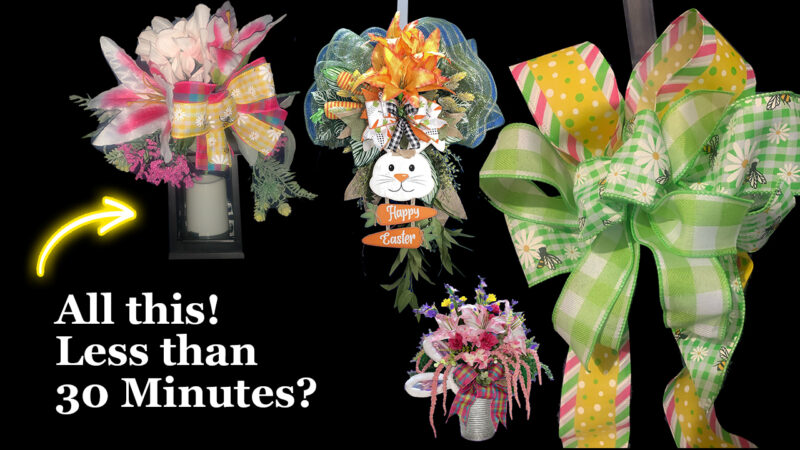
As Easter approaches are you looking for fun and creative ways to decorate your homes? Maybe you want to create a unique gift for a friend or family member. Whatever the reason, creating a swag, lantern bow, or other decorative item is a great way to add a personal touch to any space.
The good news is that you don’t have to be a crafting expert to create these items. With a few simple bow-making materials and the tips and hacks provided in this blog post, you can easily create a swag, lantern bow, or other decorative items in less than 30 minutes. Watch this Facebook Live as Sandy and Joette from Bowdabra teaches how to make these easy DIY Swags and bows, lantern and so much more!
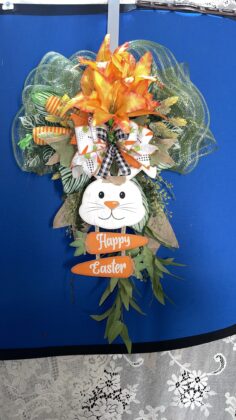
Easter Swag (Starts at 1:08)
Materials required:
- 100-Yard Bowdabra Bow Wire
- Large Bowdabra
- Green-Gold Mesh
- 4” Wide Burlap Ribbon Roll
- Greenery, leaves, yellow Floral, orange lily flower, dollar tree carrots, Eucalyptus Picks
- Dollar Tree Bunny (Happy Easter Sign Décor)
- Green and Orange Burlap Ribbon Roll
- Carrot Ribbon Roll
- Black/White Ribbon Roll

Easter Swag
Process:
- Joette folds the bow wire in half and tucks it underneath the Bowdabra.
- She places the green-gold mesh (2 pieces) and scrunches it down into the Bowdabra.
- She places a 4” wide burlap ribbon tail (dovetailed ends) inside the Bowdabra.
- She lays down a few pieces of greenery, leaves, yellow floral, orange lily flower, dollar tree carrots, eucalyptus picks, and a Dollar Tree Bunny (Happy Easter Sign Décor) into the Bowdabra.
- She places 14” long two burlap tails (dovetailed ends) inside the Bowdabra.
- She places two green burlap and orange burlap tails and one carrot ribbon tail (dovetailed ends) into the Bowdabra.
- She lays down the carrot ribbon and creates 4 loops. Then Joette places black/white ribbon and creates 2 loops.
- She places a little green mesh and scrunches it down into the Bowdabra.
- She secures the bow with several wire knots in the back and finishes off by fluffing the loops.
DIY Hair Bow (Starts at 10:20)
Materials required:
- 100-Yard Bowdabra Bow Wire
- Mini Bowdabra
- Purple-White Gingham Check Ribbon Roll
- White Ribbon Roll
- Hairclip
Process:
- Sandy folds the bow wire in half and tucks it underneath the Bowdabra.
- She puts the little piece of purple-white gingham check ribbon (dovetailed ends) inside the Bowdabra and then places the white ribbon in and creates 2 loops.
- She secures the bow with several wire knots in the back and finishes off by fluffing the loops.
- She places the purple-white gingham check ribbon in again and creates 2 loops. Then she adds 2 more little ribbons and secures the bow with several wire knots in the back and finishes off by fluffing the loops. Finally, she attaches the bow to a hair clip.
DIY Door Hanger (Starts at 13:26)
Materials required:
- 100-Yard Bowdabra Bow Wire
- Large Bowdabra
- Flat Sided Bucket (Styrofoam inside)
- Dollar Tree Foliage Fern, Yellow Floral, Purple Floral, Red Floral, Lily Flower, Hanging flowers, Greenery, Hydrangea Bush Picks
- Multicolored Plaid Ribbon Roll
- Burlap Ribbon Roll
- Bunny Ears Headband
DIY Door Hanger
Process:
- Joette folds the bow wire in half and tucks it underneath the Bowdabra.
- She lays down a few Dollar Tree foliage ferns, yellow floral, purple floral, red floral, lily flower, hanging flowers, greenery, and hydrangea bush picks into the Bowdabra.
- She places the dovetailed tails from the multicolored plaid ribbon roll inside the Bowdabra.
- She places both the ribbons (multicolored plaid, burlap ribbon) together and creates 4 loops. She sticks the bunny ears headband inside.
- She secures the bow with several wire knots in the back and pushes them straight down into the styrofoam.
Lantern Swag (Starts at 21:40)
Materials required:
- 100-Yard Bowdabra Bow Wire
- Large Bowdabra
- Lily Flower, Greenery, and more floral Picks
- Multicolored Plaid Ribbon Roll
- Bee Ribbon Roll
- Lantern
Lantern Swag
Process:
- Sandy folds the bow wire in half and tucks it underneath the Bowdabra.
- She lays down a few lily flowers, greenery, and more floral picks into the Bowdabra.
- She places two dovetailed tails from the multicolored plaid and bee ribbon rolls inside the Bowdabra.
- She places both the ribbons (multicolored plaid, bee ribbon) together and creates 3 loops.
- She secures the bow with several wire knots in the back and finishes off by fluffing the loops.
- In the end, she attaches the bow to a lantern.
Big Wreath Bow (Starts at 25:00)
Materials required:
- 100-Yard Bowdabra Bow Wire
- Large Bowdabra
- Yellow Polka Dot Ribbon Roll
- Green Bee Ribbon Roll
- Green-White Gingham Ribbon Roll
Big Wreath Bow
Process:
- Sandy folds the bow wire in half and tucks it underneath the Bowdabra.
- She lays down the yellow polka dot ribbon into the Bowdabra and curls up the ends.
- She places again the yellow polka dot ribbon in, creates 2 loops, and snips it off.
- She places the green bee ribbon in twice, creates 1 loop each time, and snips it off.
- This time she places the green-white gingham ribbon in twice creates 1 loop each time and snips it off.
- She takes the same green-white gingham ribbon, cuts off another piece, puts it in, and creates 2 loops.
- She secures the bow with several wire knots in the back and finishes off by fluffing the loops.
Please join us on Mondays at 4:00 p.m. PST, 5:00 p.m. MST, 6:00 p.m. CST, and 7:00 p.m. EST each week for another fun Facebook live.
Did you miss any Facebook lives? You can find DIY decor bows and more at the Bowdabra blog!

