Hi everyone, Steph Ackerman is here to share how to add a bow to a handmade greeting card with Bowdabra. Don’t just give a plain old card for Birthdays, holidays and more. Give it some extra oomph with a pretty Bowdabra bow. It’s so easy with the Bowdabra to make little bows in all colors to have on hand to add to cards and small gifts. Follow the easy step-by-step tutorial:
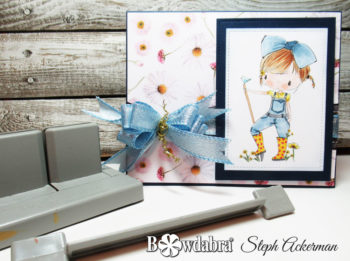
How to make and add a bow to a handmade greeting card with Bowdabra
Supplies:
Mini Bowdabra
Bow Wire
Ribbon
Instructions:
First, start by placing the Bow Wire in the Bowdabra and folding it underneath while working on your bow. Then, cut a 6″ length of ribbon and place it in the Bowdabra.
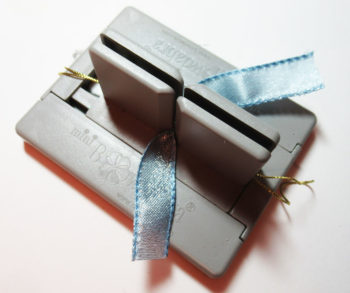
Next, lay some ribbon in the Bowdabra and create 3 loops on either side of the channel.
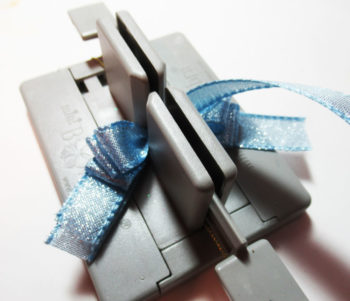
Pull up on the Bow Wire and tie off. Fluff out the bow
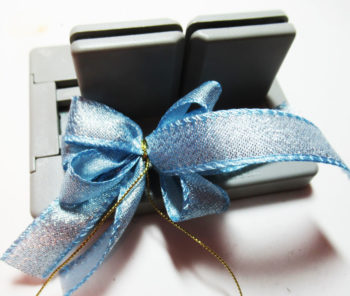
Create a handmade greeting card, and adhere the bow to the card before placing the image.
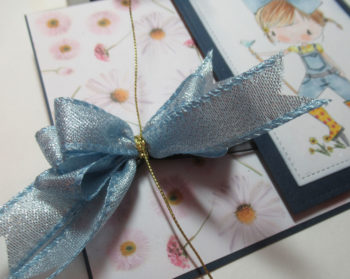
Finish assembling the card.
Using a craft pick, twirl the bow wire.
Cut the ribbon lengths and fluff out the bow. You can alternately add a Bowdabra bow to a purchased greeting card as well.
Thanks for stopping by.
Steph