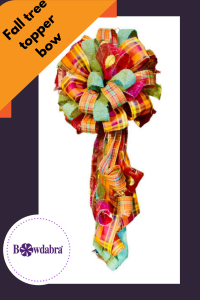
Yes, you can make this gorgeous fall tree topper bow with Bowdabra even if you are a beginner bow maker. This perfect, professional-looking bow is really quite easy. Bowdabra designer, Joette shows you how in this easy Video DIY. Use the same technique with different ribbons to make a beautiful Christmas tree topper bow as well.

Supplies
4 different Fall patterns and sizes of ribbon
(These ribbons are from the Bowdabra Fall Ribbon Design Kit)
Scissors
Ruler optional

Instructions:
This bow does not have to be the size I show here. You can customize/tailor it to fit your needs.
I used 4 different Fall ribbons here. I sized the top loops to the width I needed, which had 2 full loops on each. (Leave about 6″ extra on the stack of loops that’ll be on the top.)
Then, size the bottom half about 1″ larger than the first batch. Next, cut 4 long strips, 1 of each ribbon for the streamers.
Place the Bowdabra Wire into the Large Bowdabra, folding the streamers in half and adding them in. Now, find the center of your larger stack of loops, scrunch the center and place them in the Bowdabra. Repeat this step with the smaller loops.
When you get to the last loop with the extra 6″, fold that extra end back over through the Bowdabra, creating a small 3rd loop. Tie this stack up with the Bowdabra Wire real tight and now you are ready to fluff your Bow.
Separate the stacked loops as your twist them apart. (I explain it better visually in the video.) Once your bow is fluffed, hang it in the tree and do another touch-up fluff. That’s it, you will have a fall tree topper bow that looks like it was made by a pro!