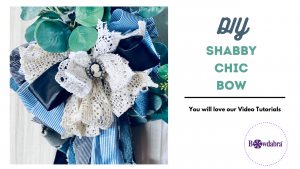
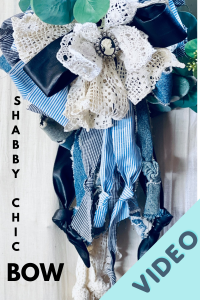
Bowdabra designer, Joette is here today to show you to easily make a farmhouse shabby chic rag bow in minutes. Watch the video and follow along to make your own.

Shabby chic rag bow video DIY
SUPPLIES:
Large Bowdabra
Bowdabra Wire
Zip tie
Designers Choice: Mix and match approx 1.5″ strips of material, old clothing, denim, cotton, lace, etc…
Use as many strips as you need… I used a combo of 4, 3, 3 & 2 in my loops. Strip sizes and lengths will vary, depending on where you cut your material from.
Centerpiece: Bead, button, old jewelry, tiny silk flower, etc…
A dab of glue to secure your centerpiece into the bow.

AbraBowdabra!! 


Instructions:
First, for this Rag Bow, I slice up some jeans & some cotton shirts in about 1.5” strips by 20”-24”.
I left the lace as is & I used an old leather belt from a jacket. (I had donated the jacket years ago & later found that I still had the belt.)
The centerpiece is a vintage clip-on earring that I paid $1 for at a thrift store.
You can also use a button, bead, small silk flower, and more. This is a perfect bow to make in the Bowdabra !!! I wouldn’t want to dare try to hand-tie this kind of bow, lol!! (It gets HUGE!!)
Finally, pull the zip tie tight and fluff your bow.
I can not wait to make some more of these bows. I love how this one turned out!!
Try some variations of your own
Now I can’t stop thinking about all the different possibilities & variations that you can do with these!! These are not your typical wired ribbon bows. They are meant to be distressed & floppy looking. Since they’re ‘Rag Bows’, instead of dovetail cutting the streamers, I tied them all in love knots. I mention love knots quite a bit, so I’ll explain them in more detail in this post.
Why tie the ends in knots?
This technique will prevent additional, future fraying in the material.
Back in 1983, when I first got started in the Floral Industry, we tied love knots in the streamers of the bows for weddings. The way I use Love Knots in my Decor/Designs these days do not have any specific meaning… I just like the way they look. I can achieve extra dimensions and keep my ribbon ends from fraying.
Bows were VERY popular back in the day, but they also looked very different than they do today. Bows weren’t supposed to be the ‘main event’, but just an accent to tie your colors together, sometimes hide your mechanics, added to the presentation & gave your floral piece that finished/completed look. Back then, if it didn’t have a bow on it, it wasn’t complete. In fact, the only thing I can think of that we didn’t place a bow on was a boutonnière. And if the boutonnière was for a special occasion where it would need to match a corsage, (i.e. Prom or weddings) we would add what we called a tab or tabs of ribbon on them to make both pieces match.
I can see myself making keepsake Rag Bows in the future with my grandkid’s old clothes now… Or, mini hair bows!!
If you make one of these beauties of a shabby chic Rag Bow, please tag me or share a pic in this post… I’d LOVE to see your creation!!
