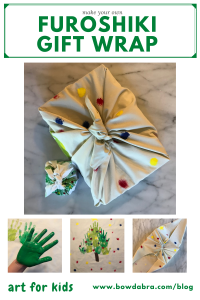
Furoshiki are traditional Japanese wrapping cloths used to wrap and transport all sorts of objects from a bento box lunch to a special gift. Furoshiki gift wraps are very environmentally healthy because they are reusable, thus eliminating gift wrap paper waste. They can also be repurposed. A furoshiki gift wrap can be refolded and knotted to form a carrying pouch or used as a scarf or displayed as a home décor piece.
Your young artist will have fun creating this special holiday gift wrap furoshiki—and, of course, the gift recipient will be thrilled. 
Here’s what you’ll need for your Furoshiki Gift Wrap:
- Square piece of fabric—most useful sizes are 19″ and 27″ square—but any size square will work. I used fabric from an old, torn bed sheet.
- Acrylic paints
- Paint brush
Here’s how it’s done:
I’ve created two different furoshiki gift wraps—the first one for a more advanced artist, and the second one with the younger artist in mind. Let’s begin with the first sample.
Fern Frond Christmas Tree Furoshiki
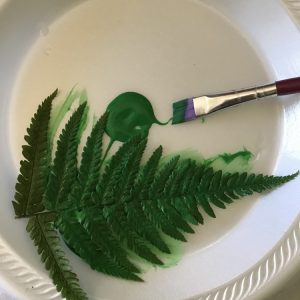
- Select a live fern frond or other tree twig with a leaf pattern reminiscent of a Christmas tree. I’m using a fern frond.
- Paint the top side of the fern.

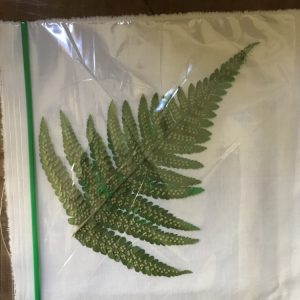
- Carefully place the fern painted side down on your cloth, and cover with a plastic bag. Now, gently press the frond to ensure paint transfer to the fabric. The plastic bag allows you to press on the frond without getting paint smears on your hands which could inadvertently transfer to the fabric.

- Carefully remove the baggie and lift the frond from the fabric. Wipe any paint from the surface of the baggie.
- Repeat Steps 2 through 4 as many times as you desire.
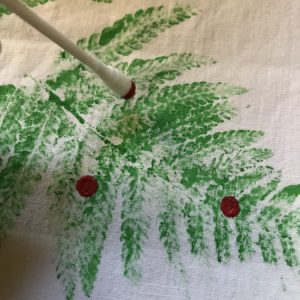
- Using a cotton swab, dab bright colors on the fern prints for tree ornaments.

Hand Print Christmas Tree Furoshiki
- Find the center of your square. Fold the square in half, then in quarters. Finger press the center folded edge.
- Use two shades of green for the tree. Paint one hand color one and the other hand color two.
- Refer to the picture below of the finished furoshiki. We’re going to stamp a row of five hand prints for the bottom of the tree. Place the first hand stamp slightly below the center mark. Press the hand firmly in place pressing straight down—no wiggling!! Lift the hand straight up.
- Now, stamp the second color to the right and to the left of the first stamp.
- Next, stamp the first color to the right side and again on the left side. Five hand prints in a row completed.
- Then, stamp a row of four hand prints, alternating colors, above the first row.
- Stamp a row of three hand prints, then a row of two hand prints, ending with one hand print for the tree top.
- Add brightly colored dots for ornaments. These can be stamped with anything round and flat (pill bottle, bottom of a condiment container) or painted with a brush. Paint a star at the top of the tree.
- Continue to add multi-colored dots for the background.
- Ta-da!! You’ve made your very own furoshiki gift wrap.
Here’s a simple furoshiki wrap. The Japanese Ministry of the Environment shows more ways to use furoshiki wraps.
- Lay furoshiki face down. Position package diagonally on the cloth.
- Bring opposite ends to the center, and tie.
- Bring remaining ends to the center, and tie.
- Furoshiki can accommodate a variety of package shapes and sizes.