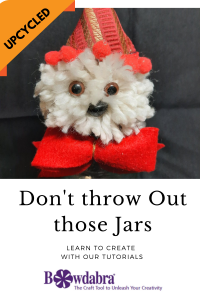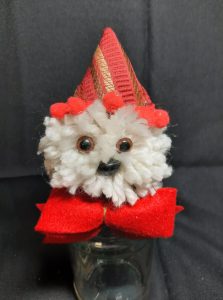
Hello Crafty People! Today we are going to Upcycle a jar. I know you save them, just in case, because they make great containers for giftable edible treats and more! This furry jar topper was fun and easy to make.
Upcycle a jar for gift-giving
Supplies:
- Bowdabra Mini Tool and Bowdabra wire
- 5″ diameter circle of scrap fabric
- Approximately 12″ of fancy trim
- 1.5″ red ribbon or substitute (I used strips of red felt)
- Any Jar
- Light-colored yarn (cream)
- Eyes and a Nose (I used findings for making stuffed animals)
- hot glue gun/stick
- scissors

Instructions:
- First, create a pom-pom with light yarn: Place a 9″ piece of yarn into the Mini Bowdabra the “wrong” way across the short side. Wrap yarn around the brackets until it’s full enough for you. You want it VERY full to have a puffy, semi-solid face, but the # of wraps will depend on the thickness of your yarn. I used a chunky/thick yarn. Pull the horizontal piece of yarn up to tie around the wrapped yarn. Remove from the Bowdabra Mini Tool and tie tightly. Trim to the desired size. My finished pom pom is approximately 5″. Glue to the lid of the jar, placing the side down where you can see the wrapped yarn holding it together.
Make the hat
- Make the hat: Mark and cut a 5″ diameter circle of scrap fabric. Apply hot glue to half of the circle’s edge and fold over. Curl the half-circle into a hat form, secure with hot glue. Add the trim around the brim, start at the back where the other seam is, so all of your seams will be in the back. Put a generous amount of hot glue around the inside of the rim of the hat and place it on top of the pom pom.
- Glue the eyes and nose into place: Spread the fibers and put the glue into a crevice and poke the “stem” of the plastic eyes and nose deep into the pom pom.
Make the bow
- Make a small bow: Place Bowdabra Wire into the Mini Tool the correct way, fold under to hold steady. Cut a 9″ piece of ribbon/felt, fork the ends to make the tail of the bow, place as the first layer into the Mini Tool. Using about 12″ of ribbon/felt, fold the ends together on the same side, overlapping a bit off center. Place into the Mini Tool. Pull the Bowdabra wire up, place the loose ends through the loop. Hold the bow down while pulling the wire up. Tie off in the back and tie around the top of the jar.
Thanks for stopping by the blog today!
Craft on!
Becky
