Hello, everyone! It’s Nancy here with you today.
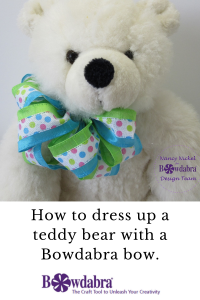
I’m excited to be sharing my first Design Team post for Bowdabra! For my first bow project, I decided to dress up a teddy bear.
Here he is in his fancy new finery:
Here is how I made it:
Teddy Bear.
1. First, cut a piece of the Bowdabra wire approximately 24″ long. Fold in half. Insert into the Bowdabra tool, as shown in the photo. Tuck the extra length under the base of the tool.
2. Next, measure around the neck of the teddy bear, and cut a ribbon to fit. In this case, it was 12″ in length. That is inserted into the Bowdabra tool, right side facing up, as shown in the photo.
8. Continue forming loops in this accordion fashion, until you have as many loops as you want. I wanted 4 loops on each side.
9. Insert the Bowdabra Wand (comes with the tool) into the tool, and press down. This scrunches all the ribbons together.
10. Untuck the Bow Wire from under the tool and pull up. One end has a loop, and one end has two cut ends. Insert the cut ends through the loop end. While holding the ribbon down with one hand, pull the cut ends of the wire up snuggly.
11. Remove the piece from the Bowdabra tool. It will look like this. Now pull the wire tight and tie a knot. Trim the extra wire off.
12. Fluff and shape the loops into your desired bow. Wrap the tail ends around the bear and tack in place. Arrange the loops as desired.
