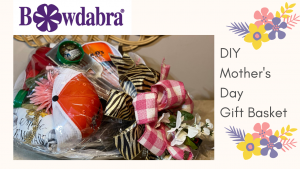
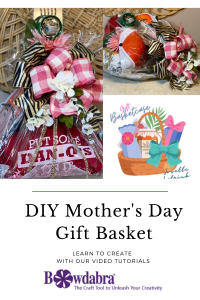
Easter has come and gone and now Mother’s Day is coming soon! For the mom who likes to grill, this Mother’s Day grill-themed gift basket is the perfect treat.

All the little kids got those cute Easter Baskets, with all the surprises and goodies to rip open and enjoy. Their little faces always light up when they see their Easter Baskets! Why not wrap Mom’s Mother’s Day gifts up the same way? Just the joy of receiving a gift with this kind of presentation is priceless!
And, it doesn’t even have to be very expensive or loaded full of items. In this tutorial, I will teach you 2 different ways you can accomplish making a very simple gift basket. I’m a grilling Mom, so you are going to see the gifts of my choice on this one. You can do something similar or personalize it for your mom.
In this example, I will be using a Grilling Basket as the basket, but almost any kind of empty container will work. Anything goes, it’s best to match the basket specifically for the recipient. Nothing says “I love you,” more than a personalized Mother’s Day gift basket!
The main gift here is the Grilling Basket but I want to make this gift more exciting, so here we go!
First, measure our cellophane on both versions and sit the basket where it needs to be when it comes time to wrap.
Now, build up the base (if necessary) and add in your shred or grass. On either version of these, almost always add the larger items in first.
In the first version, I center the larger items near the back and start building around them. On the second version, choose any side you’d like to wrap from. Once you decide where you would like your bow positioned, start placing your items in the basket where they will fit nicely but can still be seen.
Now it’s time to wrap! (This procedure is the same for both versions, just at different angles.) The basket should already be pre-centered but may need a slight adjustment. First, take your shorter sides and pull them inwards, towards each other. Now you can take your front or back pieces and cross over the side pieces. Pull everything nice and tight and get the slack out of the cellophane.
Once everything is tight, pull the other side up the same way. Then, gather everything in your hand tightly and zip tie it up. Leave a little bit of slack until you know you have all the slack out and there are no gaps. (It is ok to use packing tape if there are gaps and slack in your wrapping.)
Now, trim the cellophane if necessary by pulling straight up on the piece you’re cutting, nip the area you want to be cut using an upward angle with your scissors, and give it a quick tug. Repeat until you’re happy with the look.
This is the part in version 1 I like to add something extra to the top of the basket and push it into the gap of the zip tie. In version 2 I lay the extra over the (already tightened) zip-tied area and tie the bow around it, to hold it in place. Then, I tighten the zip tie and trim.
Now it’s time to make a Bowdabra Bow! First, cut a piece of Bowdabra bow wire. Then, fold it in half and insert it into the Bowdabra. You will have a loop on one side and two loose wires on the other side. This will serve as your slipknot. Tuck the end under to stay out of the way while you are making your bow.
I’m using 3 different ribbons for this one. I cut strips from the Bowdabra ribbon to use as streamers. The other 2 ribbons were for the actual bow. I made 4 loops of both ribbons in the Bowdabra, starting and ending each ribbon with a dovetailed streamer. I added some flowers to this bow, tied it up with the Bowdabra wire. Finally, I fluff and straighten the bow. Wrap the bow wire around the zip-tied area. Pull it really tight from the halfway mark. Then bring the wire back under the bow and pull tight again and tie it off. You may need to touch your bow up a little.

I hope you get to surprise someone with a Gift Basket creation of your own this Mother’s Day! Follow Bowdabra designer, Joette on Facebook, Instagram, and Pinterest.