How to make a super cute bunny with recycled materials
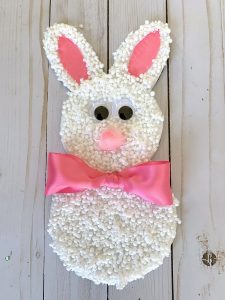
Hey kids! Want to make a super cute bunny to decorate for Easter with recycled materials? Read on…
Have I got a fun craft for kids and parents to do together! Did you know that styrofoam blocks – the kind you find as the packing material is composed of tiny foam pellets? Why yes! And it’s in the group of non-recycled material! So let’s take those blocks and a few other non-recycled materials and have some fun!
Supplies needed:
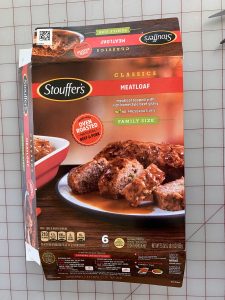
- Saved boxes from frozen food items
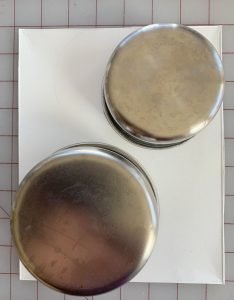
- Items to draw two circles – one larger than the other
- Styrofoam egg
- Styrofoam plates
- Safety scissors, pencil
- Alleene’s Tacky Glue
- Googly eyes
- Pom pom
- 1.5″ Satin Ribbon
- Foam packing blocks
- Folk
- Container to scrape and hold pellets
- Paintbrush
- Mini Bowdabra, Measuring Tool, Wand
- Bowdabra Bow Wire
Instructions:
Let’s begin by opening the frozen food boxes to expose the plain sides. You will need at least two boxes to make two sets of circles and ears.

Next, draw two circles of each size and cut them out.

Draw two sets of ears free-hand and cut out or if you can’t draw, use a styrofoam egg and cut in half to draw ears.
Then glue the pieces together with tacky glue so the plain sides are showing on the outside.
Use the glued-together pieces of the bunny to draw on foam plates and cut out.
Then glue the foam pieces to the cardboard pieces.
Once all the foam pieces are dry, glue the bunny together with tacky glue and let dry.
Then glue on the googly eyes . . .
and pompom for the nose. Use ribbon to cut out the inner ears free-hand . . .
and glue in place.
The next part is quite messy! You might want to cover the area since the pellets have a tendency to fly and get everywhere. Kids will love this! It will get all over your hands and anything nearby. But, it’s easily removed just by rubbing your hands together and brushing the pellets off. Be sure to have a trash can nearby and vacuum when finish.
Use a fork to scrape the sides of the styrofoam packing block to release the round-shaped pellets into a container.
You can also use your fingers to separate the pellets too!
Once you’ve collected enough pellets, apply tacky glue all over the bunny . . .
and use a paintbrush to spread the glue over the entire bunny except for the inner ears, eyes, and nose.
Then begin applying the pellets over the glue.
Kids will love this part and they might get carried away with applying the pellets!
Once the bunny is covered with pellets, let dry.
Make the bunny’s bow
Now it’s time to make a bow tie using the Mini Bowdabra to complete the look!
First, cut an 18″ strip of Bowdabra bow wire, fold in half, and lay it into the Mini Bowdabra. Then, pinch the end of a 12″ length 1.5″ wide ribbon and insert it into the Mini Bowdabra.
Next, pinch ribbon on the opposite end and bring over the Mini Bowdabra tower and . . .
place down into the Mini Bowdabra.
Then, pinch the center of the ribbon, using the hair bow ruler to make sure the loops are even, down into the Mini Bowdabra. Scrunch the ribbon down using the Mini Bowdabra wand.
Then thread the two loose ends of the bow wire through the loop at the other end. Pull the bow wire tightly while pulling the bow out.
Take the ends of the bow wire around to the back of the bow and tie in a double knot. Then cut off excess bow wire.
To make a finishing ribbon to cover the bow wire, cut a 6″ piece of ribbon and fold it over into thirds.
Wrap around the center of the bow . . .
tying in a double knot in the back . . .
and cutting off excess ribbon. Seal ends with the flame of a match for an adorable bow tie!
Attach bow tie to the bunny between the head and body using glue.
Decorate with your cute bunny for Easter this year! Join us every Monday at 4:00 p.m. PST, 5:00 p.m. MST, 6:00 p.m. CST, and 7:00 p.m. EST, Bowdabra, will host a Facebook live.