Bowdabra wishes you all a Happy New Year 2021. Watch Nick from Nick’s Seasonal Décor on Bowdabra Facebook Live as he shows you how to make spring and winter bows.
Learn some fascinating bows using different styles and textures of ribbons for upcoming Valentine’s Day, Saint Patrick’s Day, Mardi Gras, 4th of July, and other celebrations. You will also see how to create a wreath using many of the bows you make at the end of the tutorial.

How to make spring and winter bows with Bowdabra
Tune in to learn the process of how to make these spring and winter bows – from scratch!
1. Bow with Burlap Ribbon (Starts at 2.20 mints)
Materials required:
- One Burlap Ribbon Roll
- Bowdabra bow wire
- Large Bowdabra Tool
Bow with Burlap RibbonProcess:
1. Nick folds the bow wire in half and places it underneath the Bowdabra.
2. He cuts off a ribbon piece of around 40 inches long
3. He cuts off both the edges in a dove-tail fashion
4. He places it right into the Bowdabra Tool
5. He picks up a ribbon edge from the roll and places the ribbon underneath the Bowdabra holding half-an-inch at one side and creating a loop on the other.
6. He creates 5 loops on either side without snapping off the ribbon from the roll.
7. To secure the bow he brings the wire from one side to another and puts a slip knot
8. He finishes off by fluffing the loops and cutting the dovetail pattern on the tail ends.
2.Bow with Pipe Cleaner Edge Lime Green Ribbon (Starts at 9.57 mints)
Materials required:
- Wreath
- One Ribbon Roll (Pipe Cleaner Edge Lime Green)
- Bowdabra bow wire
- Large Bowdabra Tool
Process:
1. Nick folds the bow wire in half and places it underneath the Bowdabra.
2. He cuts off a ribbon piece and creates one loop with two tails
3. He places the ribbon loop in Bowdabra
4. He picks up the ribbon edge from the roll and places it in the Bowdabra in a reversed fashion of the earlier loop
5. He cuts the ribbon from the roll
6. He repeats step 4 and 5 to create more ribbon loops (each time reversing it)
7. To secure the bow he brings the wire from one side to another and puts a slip knot
8. He makes a dove-tail design at the end of all the tails
Now, the bow that now looks like a poinsettia flower is ready to be used with the wreath
3. Bow with Watermelon Ribbon (Starts at 14.37 mints)
Materials required:
- Wreath
- One Ribbon Roll (Pink Ribbon with Yellow Edges)
- Bowdabra bow wire
- Large Bowdabra Tool
Bow with Watermelon Ribbon
Process:
1. Nick folds the bow wire in half and places it underneath the Bowdabra.
2. He cuts off a ribbon piece and folds it at the half mark and makes a dove-tail design at both ends
3. He places the ribbon at half-mark inBowdabra creating two tails
4. He creates four loops on either side (Keeping the upper loop half-an-inch shorter every time)
5. To secure the bow he brings the wire from one side to another and puts a slip knot
8. To make the knot firm, he further brings the wire on the other side and tightens it up
4.Bow with Heart bow Ribbon (Starts at 17.48 mints)
Materials required:
- Wreath
- One Ribbon Roll (Pink Ribbon with Yellow Edges)
- Bowdabra bow wire
- Mini Bowdabra Tool
Process:
1. Nick folds the bow wire in half and places it underneath the Bowdabra.
2. He cuts off two pieces of the ribbon of equal size and places them together (with heart designing facing up and down)
3. He places the ribbon pieces in the Bowdabra tool with the long tails on the same side
4. He picks up the ribbon roll to create a couple of loops
5. To secure the bow he brings the wire from one side to another and puts a slip knot
8. To make the knot firm, he further brings the wire on the other side and tightens it up
Now, the bow is ready to be used with the wreath
5. St. Patrick’s Day Double-Ribbon Bow (Starts at 20.40 mints)
Materials required:
- Wreath
- One Ribbon Roll (Lime Green)
- One Ribbon Roll (Emerald Green)
- Bowdabra bow wire
- Mini Bowdabra Tool
St. Patrick Day Double-Ribbon Bow
Process
1. Nick folds the bow wire in half and places it underneath the Bowdabra.
2. He takes both Lime Green and Emerald Green Ribbons
3. Placing one ribbon on another, and holding edges together he places them in Bowdabra
4. He creates 3 loops on each side, i.e., a total of 10 loops
5. He adds a tail to the ribbon loops
5. To secure the bow he brings the wire from one side to another and puts a slip knot
8. To make the knot firm, he further brings the wire on the other side and tightens it up
9. He straightens up the ribbons to give it a professional final touch
Creating a Beautiful Wreath
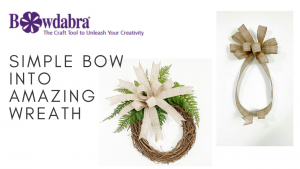
He places the burlap ribbon bow on a wreath and ties it up. He uses some green ferns on both sides of the bow to give it an elegant look.
Creating a Beautiful Wreath
Hope you enjoyed making these gorgeous spring and winter bows!
For more quick and easy DIY tutorials visit the Bowdabra blog each week. And be sure and like us on Facebook. Each Monday at 4:00 p.m. PST, 5:00 p.m. MST, 6:00 p.m. CST, and 7:00 p.m. EST, Bowdabra hosts Facebook live. There is always something new to make and we take you through the quick and easy steps. Each and every week one lucky viewer will receive a special gift! The next winner could be you!

