Bowdabra turns you into a bow-making expert in just minutes! Watch Nick from Nick’s Seasonal Décor on Bowdabra Facebook Live, with lots of Christmas bow styles in funky and traditional. And even a gorgeous Lantern Swag bow for Christmas. Nick teaches us the easy steps from scratch. Tune in to learn just how to make these bows to decorate your homes and those of your loved ones this holiday season!
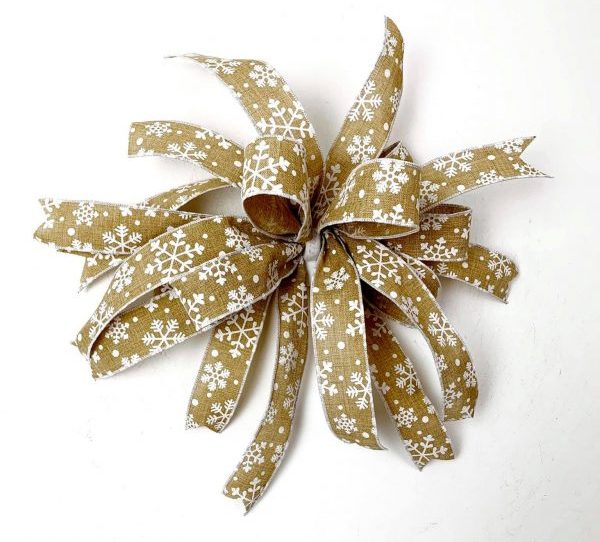
Funky Christmas bow styles with snowflake ribbon (Starts at 2:15)
Materials required:
- 100-yard Bowdabra silver bow wire
- Large Bowdabra
- 1½” snowflakes ribbon roll

Funky Christmas bow with snowflakes ribbon
1. Nick folds the bow wire in half and tucks it underneath the Bowdabra.
2. After cutting the tails, he pinching it about 4½” loop and slipped right into the Bowdabra.
4. Using one ribbon he creates 6-7 big loops to make the funky bow for Christmas.
5. To secure the bow he brings the wire from one side to another and put a slip knot.
6. He finishes off by fluffing the loops and cutting the dovetail pattern on the tail ends.
One Traditional bow for Christmas (Starts at 8:36)
Materials required:
- 100-yard Bowdabra silver bow wire
- Large Bowdabra
- Snowflake ribbon roll

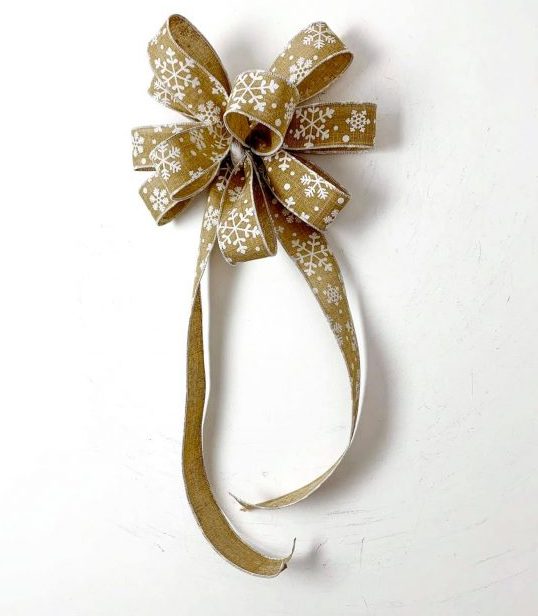
One Traditional bow for Christmas
1. Nick folds the bow wire in half and tucks it underneath the Bowdabra.
2. He places 18” tail right into the Bowdabra with the snowfakes ribbon roll.
3. To create the perfect loops, flip the bowdabra with each turn while twisting the ribbon and placing the loops.
4. He creates 5 big loops on both sides of the bowdabra to give it a beautiful traditional design.
5. He secures the bow with several wire knots in the back and finishes off by fluffing the loops and cutting the dovetail pattern on the tail ends.
Burlap snowflake printed ribbon bow (Starts at 12:47)
Materials required:
- 100-yard Bowdabra silver bow wire
- Large Bowdabra
- 2½” Burlap ribbon roll
- 1½” Buffalo Plaid ribbon roll
Burlap snowflake printed ribbon bow
1. Nick folds the bow wire in half and tucks it underneath the Bowdabra.
2. After cutting the tail, he places it right into the Bowdabra and creates 2 loops (4½”) on both sides of the bowdabra with the burlap ribbon roll.
3. He places 7-8” tail right into the Bowdabra with the Buffalo Plaid ribbon roll.
4. He creates 2 loops on either side of the Bowdabra with a cute button loop in the center.
5. To secure the bow he brings the wire from one side to another and put a slip knot.
6. He finishes off by fluffing the loops and cutting the dovetail pattern on the tail ends.
One Simple Fall Bow for Thanksgiving (Starts at 18:27)
Materials required:
- 100-yard Bowdabra silver bow wire
- Large Bowdabra
- A chequered ribbon roll
One Simple Fall Bow for Thanksgiving
1. Nick folds the bow wire in half and tucks it underneath the Bowdabra.
2. After cutting the tail, he creates a loop and places it right into the Bowdabra.
3. He repeats the process with the ribbon till there are 4 loops.
4. To secure the bow he brings the wire from one side to another and put several knots.
5. He finishes off by fluffing the loops and cutting the dovetail pattern on the tail ends.
A gorgeous Lantern Swag bow for Christmas (Starts at 24:40)
Materials required:
- 100-yard Bowdabra silver bow wire
- Large Bowdabra
- A red chequered ribbon roll
- Lantern Swag
- Decorative Pine cones and berry picks
A gorgeous Lantern Swag for Christmas
1. Nick folds the bow wire in half and tucks it underneath the Bowdabra.
2. After cutting the tail, he creates a loop with the red chequered ribbon roll and places it right into the Bowdabra.
3. He creates 3 loops to make the simple bow.
4. He secures the bow with several wire knots in the back and finishes off by fluffing the loops and cutting the dovetail pattern on the tail ends.
5. He adds the bow to the decorative pine cones and berry picks and wraps it really tight with a wire.
6. Finally, he tied it up with the Lantern Swag.
Lantern Swag for Christmas
Be sure to visit the Bowdabra blog for more amazing tutorials and video DIYs. And please follow us on Facebook. Each Monday at 4:00 p.m. PST, 5:00 p.m. MST, 6:00 p.m. CST, and 7:00 p.m. EST Bowdabra hosts a Facebook live. You won’t want to miss it and you may be the lucky viewer who wins a special gift!
