Watch Nick from Nick’s Seasonal Décor break down the process of creating a miniature Christmas wreath, step by step, just for us as he does with several other kinds of Christmas bows on Bowdabra Live this week. Watch this Live and you will be all set for the celebrations – especially for the Christmas season ahead.
Materials required:
• 100 yard Bowdabra bow wire spool
• 1½” gold and red plaid ribbon roll
1. Nick folds the bow wire into half, and tucks it into and underneath the Bowdabra.
2. He creates a loop with the plaid ribbon and adds it to the Bowdabra, and follows it up with 4-5 loops.
3. He then goes on to pull the bow wire from one end of the Bowdabra to the other and ties the bow up to secure it well.
4. He finishes off by fluffing up the loops to make the bow real pretty.
Materials required:
• Pretty shimmery turquoise colored ribbon
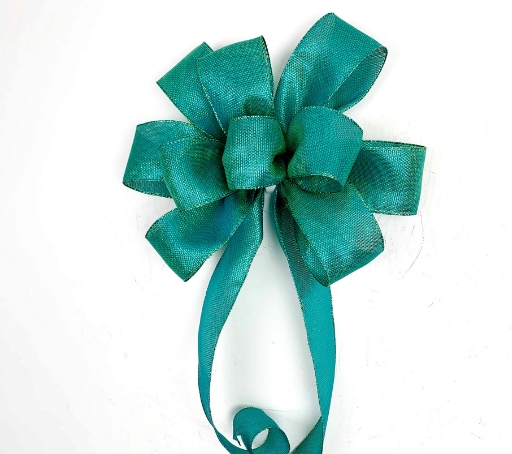
A Funky Turquoise Bow
1. Nick folds the bow wire into half, and tucks it into and underneath the Bowdabra.
2. He fashions a long tail for this turquoise bow with the pretty dovetail pattern on its tail ends before creating three loops (4”-5” wide) out of it.
3. He goes on to make two more loops that are a bit smaller than the original ones and finishes the bow off with a miniature button loop, and follows it up with compressing the bow right down the middle.
4. Nicks then pulls the bow wire through a slip knot to secure the bow, ties it up and fluffs all the loops up to give it a professional touch.
Materials required:
• Red and green deco-mesh ribbon
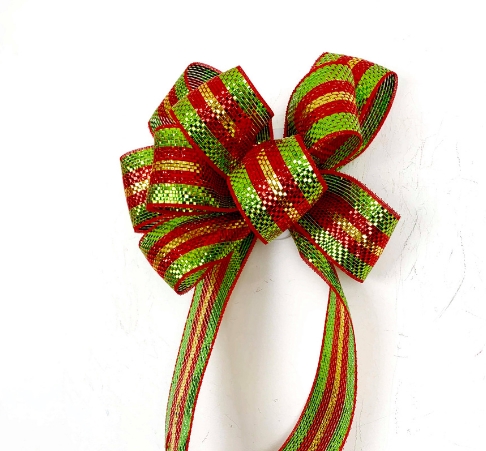
A Traditional Deco-Mesh Bow
1. Nick folds the bow wire into half, and tucks it into and underneath the Bowdabra.
2. He creates a medium tail for this bow with the pretty dovetail pattern on its tail ends before creating several loops out of it in the Bowdabra.
3. He pulls the bow wire through a slip knot to secure the bow and ties the traditional red bow up.
4. He then fluffs up all the loops to make the bow really pretty.
Materials required:
• Black and white ribbon with a Christmas message printed
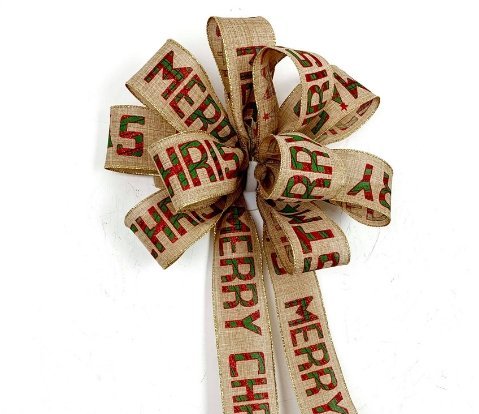
Christmas Greeting printed on it
1. Nick begins making the bow by folding the bow wire into half, and tucks it into and underneath the Bowdabra.
2. For this unique bow, he adds the tail in a manner so that the message is visible and clear to all.
3. Then he adds several loops of the ribbon in the Bowdabra for a full bow.
4. He pulls the bow wire through a slip knot to secure the bow and ties it up.
5. He then curls the tail ends with the help of his fingers before fluffing up all the loops for good measure to provide it a smooth finishing touch.
Materials required:
• Green wreath
• Red and white frost-flaked ribbon
• Christmas themed embellishments such as pines; different kinds of greenery, leaves and sprigs; berries, etc.
• Hot Glue

A quick and gorgeous Mini Christmas Wreath
1. Nick takes the green wreath and prepares it first by attaching some sprigs and pine cones to it.
2. He takes his ribbon roll and fashions a long tail for this bow with the pretty dovetail pattern on its tail ends before creating several loops out of it in the Bowdabra.
3. He pulls the bow wire through a slip knot to secure the bow and ties it up, and then creates his favourite dovetail pattern on the bow tail ends before fluffing up all the loops for good measure for a smooth finishing touch.
4. As always, he remembers to fluff up all the loops of the pretty bow to give it a cute look.
5. Then he moves on to affix the red and white frosty bow to the wreath he had prepared earlier, and goes on to add as many embellishments as he likes to it.
