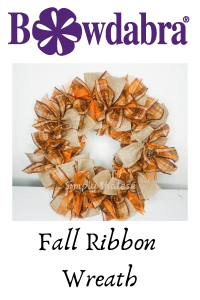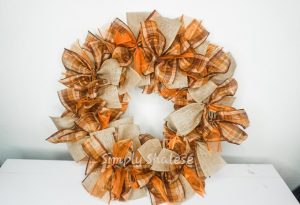
Hey everyone, I’m Simply Shalese, here to make something awesome with you guys! Today we will be making an adorable fall ribbon wreath. Let’s get started!
Wreath Frame
Plaid Wire-edged Ribbon
Burlap Wire-edged Ribbon
Orange Wire-edged Ribbon
Chenille Stems
Scissors
Place half of a chenille stem in the center of the mini bowdabra. Take your ribbon and cut them into 8 inch long pieces. Take your first piece of ribbon and fold it in half to find the center. Scrunch the center – fold it in half, bring the front, and the backup and scrunch it in the bowdabra. I decided to use four pieces of ribbon in each bundle but you can use as many or as few as you’d like. I alternate between the plaid, burlap, and orange ribbon. When placing the ribbon, be sure to crisscross the ribbon so that no two pieces are overlapping. Use your wand to scrunch everything together.
Once you have all of your ribbon in place, give your bundle one final scrunch. Take your chenille stem and cross them two times. Make sure it’s tight and remove the bundle from the bowdabra. Twist the stem toward the back one more time and twist it a couple of times to make sure it’s nice and secure.
After you’ve made all of your bundles, it’s finally time to start placing them on the wreath ring. I prefer to use the center two rings. You do have the option of using the outer two and inner two stems and alternating the two. Whichever way works better for you. I decided to place 3 bundles in each of the 6 sections for a total of 18 bundles on the entire wreath. You can add more or less, it’s completely up to you.
And you are all done. Add in any additional embellishments that you’d like. Be creative, have fun, and make it your own!

Thanks for joining me. Be sure to check out and subscribe to my youtube channel, Simply Shalese DIY, for more awesome videos. Also, follow me on Instagram, Pinterest and Facebook! And check out Bowdabra blog as well!

Click here to learn more about the designer, Shalese Nash.