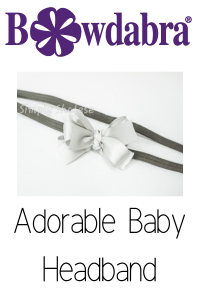
Baby Headband with Bowdabra

Hey everyone, I’m Simply Shalese, here to make something awesome with you guys! Today we will be making an adorable headband perfect for any occasion. Let’s get started!
Materials:
7/8 inch width silver ribbon
headband
scissors
hot glue gun
Placing the Bow Wire
The first thing I do is fold the bow wire in half and place it in the center of the Bowdabra. I like to use about 9-10 inches of bow wire.
Adding Your Loops
Take your 8-inch long piece and fold it in half to find the center. Scrunch the ribbon in the center. I prefer a uniform scrunch, fold the ribbon in half, bring the front, and the backup and place it in the center of your Bowdabra. Take one side, make another loop, and scrunch it again.
Repeat the same step with the other side of the ribbon. Use your wand to scrunch everything together and make any necessary adjustments.
Repeat this step with the other two pieces of ribbon. I decided to use 3 pieces but you can use as many or as few as you’d prefer. Also, the size of the bow is completely up to you. Make the loops as large or as small as you’d like.
You can also use a lighter to finish off any frayed edges.
Tying the Wire
Give your bow one final scrunch. Then take the bow wire, the two open ends inside of the loop. Hold the bow in place and give it a nice tug. Then remove it from the Bowdabra. Tie it in a knot a few more times just to make sure it’s nice and secure.
Attaching the Bow to your Headband
Use the bow wire to tie the bow to your headband and then cut away the excess bow wire. For extra security, you can add a small amount of hot glue.
Adding your center
Take another piece of ribbon and tie it in a knot. Place the knot in the center of your bow. There are two ways you can complete the next step. You can either tie the ribbon in the front again to make two extra tails or you can leave the ribbon at the back, cut away the excess ribbon and use hot glue to secure it in place. Either way will work.
And you are all done. Change the size, color, style, theme, whatever you’d like. Just have fun with it and make it your own.
Thanks for joining me. Be sure to check out and subscribe to my youtube channel, Simply Shalese DIY, for more awesome videos. Also, follow me on Instagram, Pinterest and Facebook! And check out Bowdabra Blog as well!
