Christmas time can be quite overwhelming – and one way to help overcome this is to start early and get a jump on the holiday season by making Christmas in July craft projects.
Here’s a simple, creative idea to get you started that looks impressive but uses only a few items and little time to make!
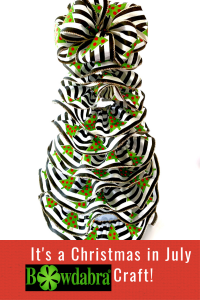
It’s a Christmas in July Bowdabra Craft! – A Ruffled Ribbon and Bow Lighted Cone Tree!
Supplies Needed:
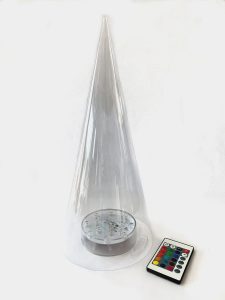
Clear Plastic Cone Tree – 15″
Wired Ribbon – 2.5″ wide
Measuring tape, straight pins/hot glue/scissors
Remote Control Base Light – 4″
Mini Bowdabra/Wand
Bowdabra Bow Wire

To Make the Ruffled Ribbon: For the first row, cut off approximately 54 inches of wired ribbon. You want the ruffle to be very curvy so don’t skimp on the amount of ribbon used. I’m using ribbon from a 50yd roll I got from Sams, but I think a little over 10 yds should work, too! And since the ribbon’s design is on one side, make sure the pattern is upright and not upside down.
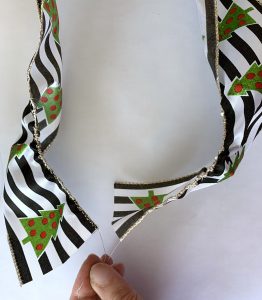
Then gently pull out a little bit of wire from the top side of one end of the ribbon and then the other end. Secure one side by crimping the wire around and together a few times. Do this so, while you’re pulling out the wire to gather the ribbon, wire on one side will not disappear into the fabric which will make it almost impossible to gather the fabric on that end.

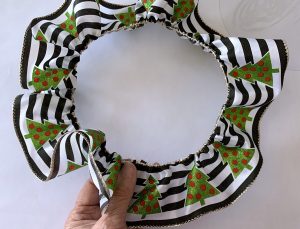
Continue pulling the wire out, gathering into ruffles. Then measure the ruffle around the base of the plastic cone to fit, adjusting ruffles and pinning in place. Wrap excess wire into a tiny pile, squeezing together. Then glue ruffle in place with a dab of glue.
Add the ruffled ribbon to the cone

Place ruffle on the plastic cone for the first layer.
Continue making additional ruffle layers, gathering the ribbon . . .
adding layers, to cover the cone.
Continue to add ruffled ribbon
Be sure to continue to cut the ribbon in long lengths despite the narrowing of the tree to get the curvy effect of ruffles for each layer. I used at least 24 inches of ribbon for each of the last few layers.
Twelve ruffled layers in total.
To make the Mini Bowdabra Bow top:
Pinch one end of a 26″ strip of ribbon, and place faced down into the Mini Bowdabra.
Then take the other ribbon end up and over the Mini Bowdabra tower, creating a large loop across and squeezing the ribbon down into the slot, smoothing out.
Pinch the center of the ribbon and insert down into the Mini Bowdabra, creating three-inch loops on each side.
Continue taking the ribbon over the tower and down into the Mini Bowdabra to create loops since the design on the ribbon is on one side and upright.
Scrunch down the loops with the Mini Bowdabra wand as you continue to make more loops . . .
for a total of eight loops – four on each side.
While the bow is still in the Mini Bowdabra, thread the two loose ends of the bow wire through the loop, pulling tightly while gently pulling the bow out. Tie bow wire around the back and cut off excess wire.
Attach the Mini Bowdabra bow to the top of the tree using a dab of hot glue.
Have fun using the colorful remote control lighting placed in the base to create special holiday lighting moods . . .
Great for decorating your home for the holidays!
For more quick and easy DIY tutorials visit Bowdabra blog each week. And be sure and like us on Facebook. Each Monday at 4:00 p.m. PST, 5:00 p.m. MST, 6:00 p.m. CST, and 7:00 p.m. EST, Bowdabra creator, Sandy Sandler, will host a Facebook live. There is always something new to make and Sandy takes you through the easy steps. Each week one lucky viewer will receive a special gift!