Why stick to simple hair bows when you can make them unique and stunning in minutes at home? Learn to make some exciting hair bows with Sandy Sandler, the creator of Bowdabra bow maker. Join her Facebook Live to watch her demonstrate how to make these bows in easy steps. She’ll also make some really beautiful wreath bows.
Material Required
* Large Bowdabra
* Gold Bow Wire
* Bowdabra Gold Scrunchy Ribbon
* Bowdabra Silver Scrunchy Ribbon
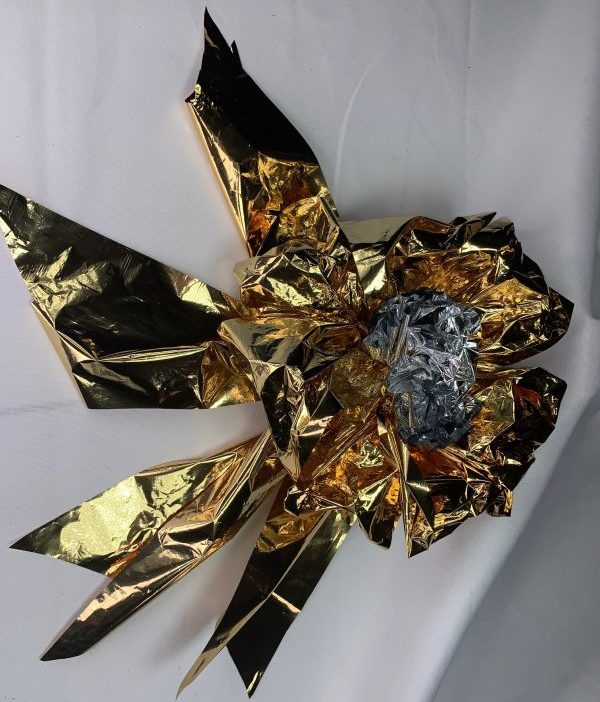
Crinkle Hair Bow
1. Sandy makes this adorable hair bow using Large Bowdabra.
2. She places two Bowdabra Gold Scrunchy Ribbons between the pillars.
3. Now she scrunches the same ribbon while making 2 to 3 loops on either side.
4. Sandy puts Silver Scrunchy Ribbon in between.
5. Next, she ties the bow with bow wire and separates the loops for a beautiful finish. Your crinkle bow is ready to use.
Material Required
* Mini Bowdabra
* 3” Purple Glitter Ribbon
* 1.5” Sheer Blue Ribbon
* Korker Ribbon
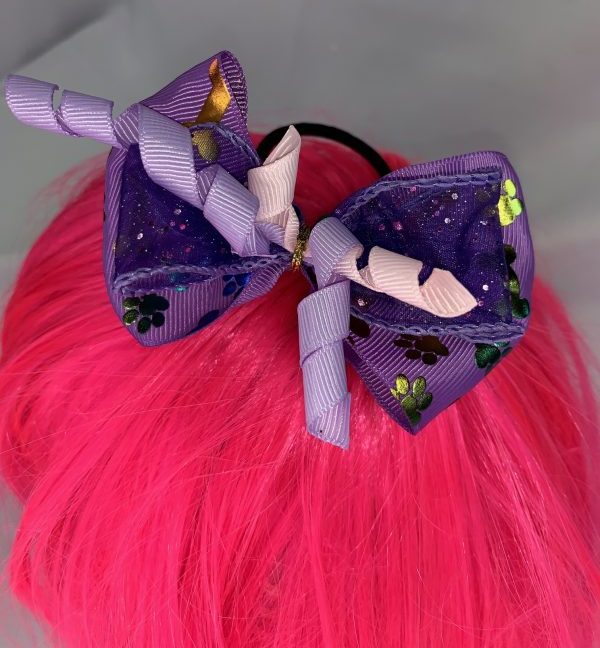
Little Hair Bow
1. She uses the Mini Bowdabra for this project.
2. Sandy takes the 11” long purple ribbon and scrunches it to make a loop on each side.
3. She repeats the same process with a sheer blue ribbon.
4. Sandy tops it up with pink Korker ribbons.
5. Now she ties the bow with bow wire and attaches it to the ponytail holder. Voila! The easy to make hair bow is ready.
Material Required:
* Bowdabra Gold Bowwire
* Mini Bowdabra
* Light Pink Sheer Ribbon
* 1.5” Sheer swirled Purple Ribbon
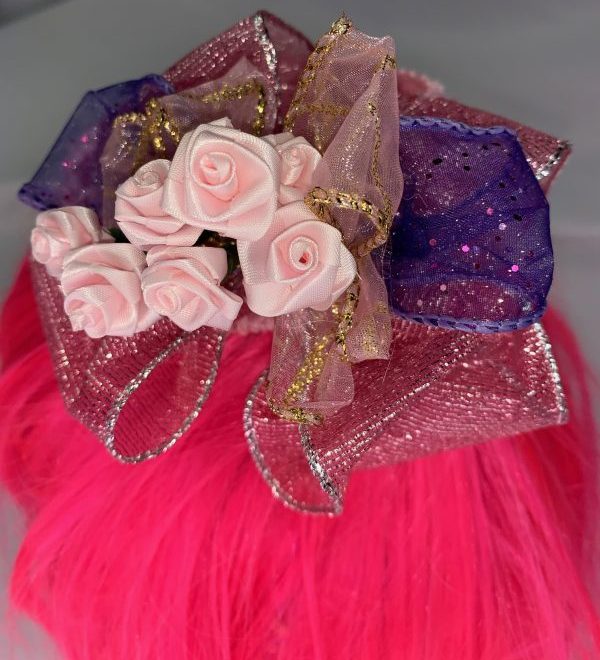
Pink-Purple Hair Bow
1. Sandy sticks to the Mini Bowdabra to make this bow.
2. She scrunches the pink ribbon in crisscross directions.
3. Now she scrunches the purple and makes a single loop on each side.
4. She repeats the process with the pink ribbon.
5. Sandy decorates it with flower picks and ties it with the headband. This beautiful headbow is perfect for little baby girls.
Material Required
* Large Bowdabra
* 2.5” Yellow Gingham Ribbon
* 2.5” Yellow Ribbon
* 2.5” Purple Ribbon
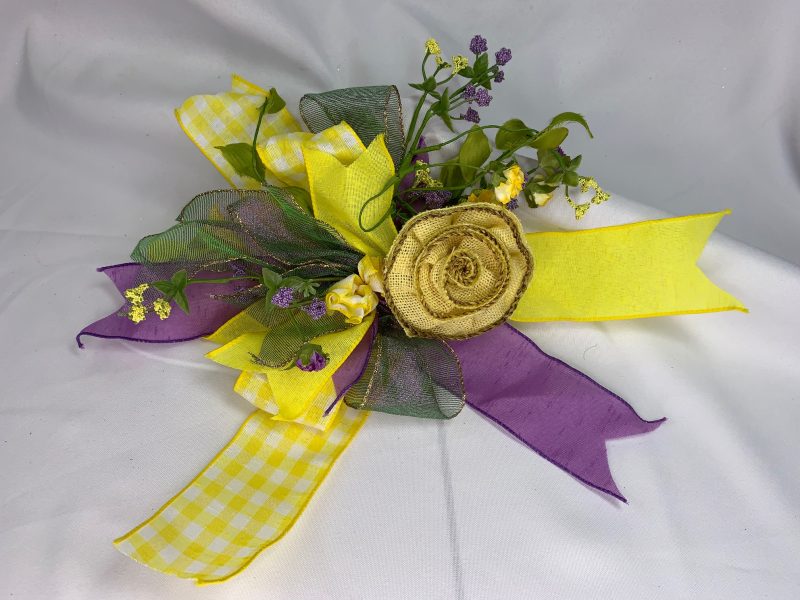
Spring Wreath Bow
1. Sandy places already dovetailed ribbons in Large Bowdabra.
2. She scrunches a sheer dark green ribbon while making a single loop on both sides.
3. Next, she repeats the process with a gingham ribbon.
4. She makes a tail using sheer dark green ribbon.
5. Now, she makes another tail with an 8” long purple ribbon.
6. Sandy uses decorative flowers stems and puts 8” long yellow ribbon and sheer green ribbon.
7. Next, she tops it all with burlap rose with a small ribbon scrunched between.
8. She ties it using bow wire and fluffs it for the final finish. This bow can be used as a wreath bow or centerpiece.
Material Required:
* Large Bowdabra
* Silver Bowdabra Bowwire
* 4” Glitter Mesh Metallic Ribbon (Ice Blue)
* 1.5” Ice Blue Ribbon
* 2” Sheer Blue Ribbon
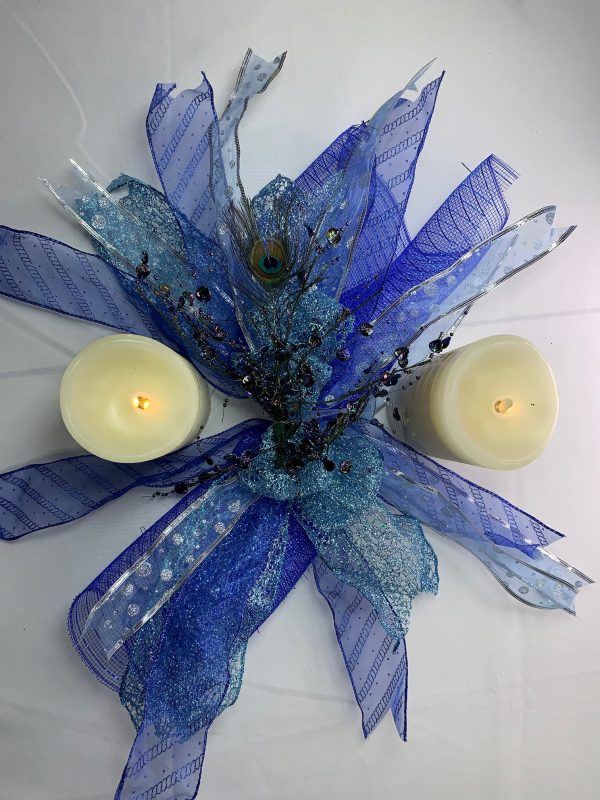
Electric Wreath Bow
1. Sandy uses Large Bowdabra for this project.
2. She places the silver bow wire between the pillars.
3. Sandy scrunches the mesh ribbon into the Bowdabra. She puts 4” Glitter Mesh Metallic Ribbon on the top of it.
4. Next, she puts a sheer blue ribbon between the pillars followed by 1.5” Ice Blue Ribbon.
5. She repeats the process with all the ribbons used before.
6. She scrunches 4” Glitter Mesh Metallic Ribbon while making single loops on each side.
7. Sandy uses a beautiful pick and ties it with the wire. Your beautiful bow is ready.
Material Required
* Mini Bowdabra
* Beige Ribbon
* Glittery green ribbon
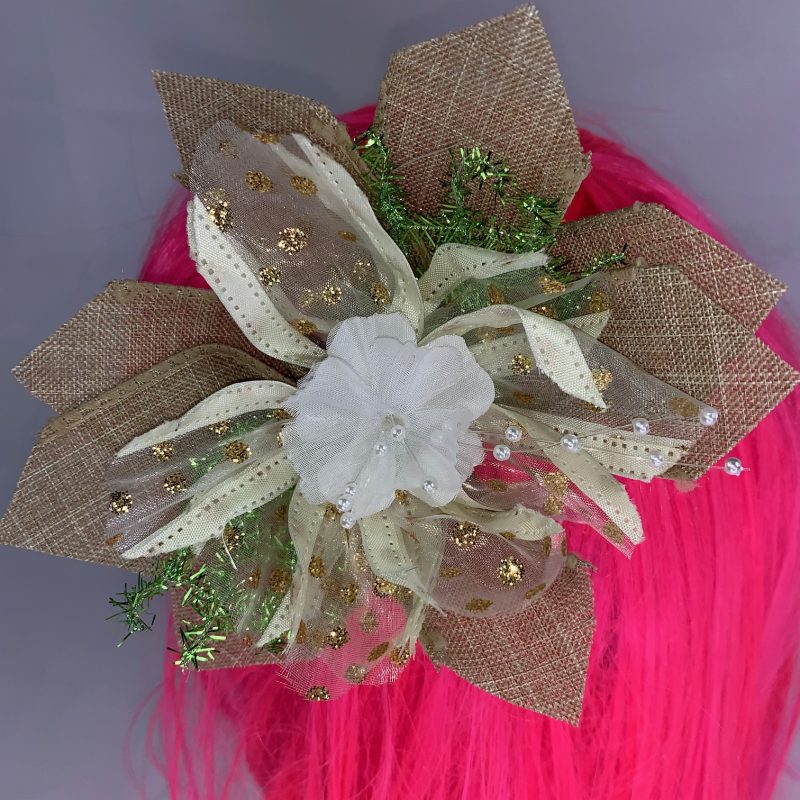
Flower Bow
1. Sandy makes this pretty flower using Mini Bowdabra.
2. She places 3 pieces of beige wired ribbon into the Bowdabra.
3. Sandy scrunches the small piece of curved green and white ribbon between pillars.
4. Next, she ties it with the bow wire and places a small flower using a zot.
5. Now Sandy takes an alligator clip and ties the beautiful flower using wire.
Material Required
* Large Bowdabra
* 3” White and Gold Ribbon
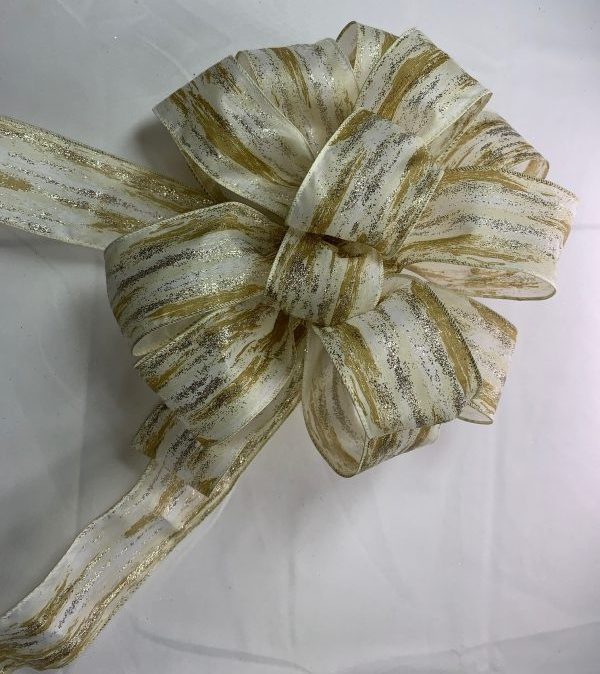
Super Easy Wreath Bow
1. Sandy puts a gold bow wire between the Large Bowdabra.
2. She places a 33” long ribbon into the Bowdabra.
3. Now she scrunches the same ribbon while making 6 to 7 loops using twist and turn method.
4. Sandy ties the bow with wire and fluffs it to give a beautiful finish.
