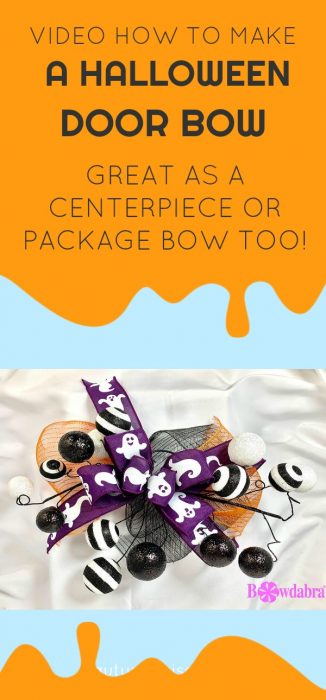
In this simple video, you will learn how to create this super cute Halloween door bow. Sandy Sandler, the creator of the Bowdabra shows you the quick and easy steps. In minutes you will have a Halloween door bow that will be sure to wow your neighbors and friends.

Super simple DIY Halloween door bow
Materials
(3) Black / White Ball Pick
(1) 10 in x 21 in Orange Poly Deco Mesh
(1) 10 in x 22 in Black Poly Deco Mesh
(2) 2.5 in x 22 in Purple Ghost Print
(1) 2.5 in x 24 in Purple Ghost Print
(1) 2.5 in x 23 in Purple Ghost Print
(1) 2.5 in x 12 in Purple Ghost Print
30 in Bowdabra Bow Wire
Bowdabra
“Hi, I’m Sandy Sandler, the creator of the Bowdabra Bow Maker. Today, I’m going to show you how to make this really fun, ghostly DIY Halloween door bow. So, let’s get started.
I’m going to start by taking my Bowdabra Bow Wire. Next, I’m going to cut a piece long enough so that I can lay it into my Bowdabra and tuck the ends underneath. So, I’m going to fold it in half and lay it in, tuck the ends underneath.
Add the mesh
Then, I’m going to just take this piece of mesh, and I’m just going to find the center, and I’m just going to scrunch it all into my Bowdabra. Next, I’m going to take my orange mesh, find the center, and just do exactly the same thing. And I’m just going to kind of shape it so that the ends go in opposite directions.
Now, I have these really cool black and white ball picks. I’m just going to lay these going in opposite directions. And now, make sure the right sides are up on these. I’ll lay this here. And then, I’m going to put ones in here. So, this is just a three-ball pick.
Add the ghost ribbon
And then, I have my ghost ribbon, which I just love. I’ve already dovetailed the ends, but just in case you’re not familiar with dovetailing, all I’m going to do is fold it in half, and I’m going to cut at a diagonal, from the end to the tip. And so, that’s how you get these really cool-shaped dovetails.
So now, I’m going to fold this piece in half, and I’m going to just place this down into my Bowdabra. And I’m going to take my other tails and lay those in. And I’m just going to kind of shape everything so it goes all over and looks really pretty when it’s on your door. Then, I’m going to take this first piece of ribbon, and take the right side of it and push it down, and just kind of scrunch that into my Bowdabra. I’m going to fold this over, again, take the right side of the ribbon and scrunch it down. And we’re going to make a graduated bow here. So, each of these pieces of ribbon is a little smaller than the next.
Continue making the bow
I’m just going to scrunch that in and bring this back around, and then take my right side of my ribbon, scrunch that into my bow, and go to the center here. This last loop’s going to be a little bit smaller. Let me scrunch that in, fold it back over, scrunch it in here and scrunch that in.
Finally, I’m going to take my wand and just give everything a final push down there. As you can see, this is such a simple way to decorate a door. And now, I’m just going to pull this through and pull it tight. You could use this also as a centerpiece, or even for a really big gift. Pull it out of my Bowdabra. I’m going to separate my ends and bring them around to the back.
And just in case you don’t know, we have a Bowdabra blog.
Now here, I’m just going to tie a knot.
Please visit Bowdabra blog We have tons of other videos and DIY tutorials.
Now I’ll just knot it one more time. And then let’s bring it around here, and we’ll just shape it. And bring these around through here. And now, you have this absolutely super, super simple DIY Halloween door bow.
Thanks so much for watching. Please don’t forget to click the red Subscribe button below, and also, like us on Facebook. I’ll look forward to seeing you in my next video.”