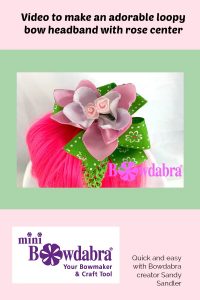
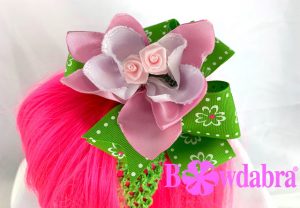
Bowdabra creator, Sandy Sandler shows you just how easy it is to make this adorable loopy bow headband with a ribbon flower center. Just think how sweet this will look on your little one on their first day of school.

“Hi, I’m Sandy Sandler, the creator of the Bowdabra Bow Maker. Today, we’re going to make this really adorable loopy bow headband with a ribbon flower center. So, let’s get started.”
First, I’ll start by taking my Bowdabra Bow Wire, which I’ve folded in half, and I’m going to tuck it underneath my Mini Bowdabra. Then, I’m going to take this really pretty green ribbon with flowers, and I’m going to just start by twisting and scrunching it down into my Bowdabra. Then, I’m going to fold it back, twist, and scrunch it. And the reason that I twist is so the wrong side of my ribbon is on the inside of my loop. So, I’m going to fold it back over and twist, and fold it, and twist. And I’m just going to keep doing that.
Oh, if you guys wouldn’t mind, if you could please click the red Subscribe button below, then you’ll be notified every time we have a new video out.
So now, I have the right side of my ribbon that I’m going to leave up, and I’m going to scrunch it so that I just have my tail here in the front. So, I’ll take my Bowdabra wand and just give everything a really good push.
Then, I’m going to take this satin ribbon, and it’s wired satin ribbon that I’ve just kind of cut at a point. And I’m going to just scrunch that down in the middle. And I have another piece the exact same size, and I’m just going to scrunch that in as well. I’m sort of shaping it as I go. And then, I’ll take my last piece of pink, and then this is a wired satin ribbon. And I’m putting a lot into this Mini Bowdabra, but I think it’s going to be really pretty when we’re finished
Next, I have this white satin ribbon that I’ve cut at a curve, so it’s kind of like petals. And that will go down in the center here. And take this one, make sure I have the right side up, and scrunch that down into the center.
Finally, I’m going to finish my loopy bow headband with my two little ribbon roses that I’ll stick right down there. I take my Bowdabra wand, give everything one final push. Whoops. Just weave those in there like that.
And then, I’ll take my Bowdabra Bow Wire, and I’m going to just pull it up. Now I have my slipknot, which is why I always fold it in half. And I’m just going to hold everything down, pull it really tight while it’s still in my Bowdabra, pull it out of my Mini Bowdabra, separate the ends and bring it around to the back. I’m going to tie a knot. Then I tie another knot.
And we have lots of hair bow videos on our Bowdabra YouTube channel, and also, at Bowdabrablog.com.
So now, I’m just going to shape this out and bring this around here, pull my ribbon roses in and just shape. And then the bow, I’m going to just shape by separating my loops and pulling them in opposite directions. So, we’ll just pull this here. So, it’s a real pretty like little loopy bow.
Now that I have it shaped how I want, I’m going to take my headband. (And I like these headbands because they have the breathing room in them.) I’m going to just take my one piece of my wire and find the seam of my headband. Then, I’m going to just feed it through. So now, it comes out on the inside of the headband. Then, I’m going to use the same piece and feed it right back through so that, when I tie it off, it won’t be against a little girl’s head. So, I’ll tie that, tie it tight again, and just one more knot for good measure. I’ll clip the ends. And you have this adorable loopy bow headband with ribbon flower center for your little girl.

So, I hope you enjoyed this video. Please subscribe to our YouTube channel by clicking the red button below. And I’ll look forward to seeing you in the next video.”