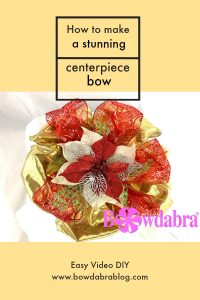
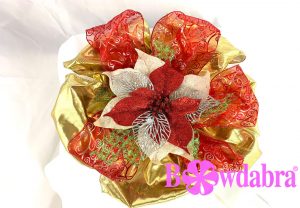
Are you ready for this amazing and so easy video DIY? Sandy Sandler, the creator of the Bowdabra is here to show you how to make an absolutely stunning centerpiece bow. It’s perfect for the elegant holiday table, add to a wreath or mantle and more. So let’s get started!

Now, we’re going to make this stunning centerpiece bow.
First, I’m going to start by taking some of my Bowdabra Bow Wire, fold it in half, and I’m just going to lay it into my Bowdabra. Then, just tuck the ends underneath so they stay out of my way.
Then, I have this beautiful kind of gold lamé ribbon, and I’m just going to twist it so I have the right side of the ribbon on the inside of my loops. And I’m just going to fold it back and forth. So again, I’m going to fold it, I’m going to twist it, and then, I’m going to fold it back, and I’m going to twist it. So, we’re just going to fold, twist, and push, and we’re just going to continue doing this. (And while you’re watching, if you guys wouldn’t mind, I would love it if you could just click the red Subscribe button to subscribe to our YouTube channel and you’ll be notified every time that we have a new video.) And I’m just going to fold it back.
And then, I’m just going to take this side here and tuck it underneath. So, I’m just going to scrunch that in and I’m going to come back and just scrunch this down in the middle. Then, take my Bowdabra wand and give everything a good push.
Now, we’re going to do exactly the same thing with our beautiful Crimson Scroll Bowdabra ribbon. So, I’m just going to twist this and lay it in. So, I want the wrong side of my ribbon to be on the inside of my loops. And I’m going to fold it back, and I’m just going to twist and scrunch it back down. Then, I’m going to fold it back over here and twist, and we’re just going to continue doing this.
Now, on this last one, I’m just going to lay this with the right side up, I’m not going to twist, and just scrunch this into my Bowdabra. And then, I’ll just use the wand and give everything a good push.
Next, I’m going to take my pieces of green mesh, and I’ve already pre-cut them, and I’m just going to lay those in here. And since we’re going to use this as like a centerpiece, I’m going to lay them going in opposite directions. This one we’ll just lay across, and just put this one in going this way.
For the last step, I’m going to take my beautiful pick. I’m just going to lay this down into my Bowdabra. Then, I’ll take my wand and just give everything a pretty good push and scrunch it all in there.
To finish, while it’s still in the Bowdabra, I’m going to take my wire, and as always, I folded it in half, so I have a slipknot. So now, I’m just going to pull it through my slipknot, hold it tight while it’s still in the Bowdabra. I pull it really tight, bring it out. I’m going to separate my ends and bring it around to the back. I’m going to tie a knot, and I’m going to tie another knot.
Now, if you decide to use this as a centerpiece, you can just leave it as is and clip it, or you can leave the ends and tie it onto a wreath, or onto a garland for a mantle bow.
So now, I’m just going to bring this around here, and I’m just going to shape my bow by pulling everything in opposite directions, and just keep pulling all of this out. And bring the back loops around. So, I’m just pulling all of my loops in opposite directions. And then, I’ll take my red loops and shape those. And then, pull my green, I just want to bring my green around here. And when you’re finished, you have this absolutely stunning centerpiece bow.

What did you think? I bet you didn’t know how easy it is to make this beautifull centerpiece bow! We’d love to hear your comments and suggestions!
Now, please remember to like us on Facebook, and also, subscribe to our YouTube channel on the red button below.”