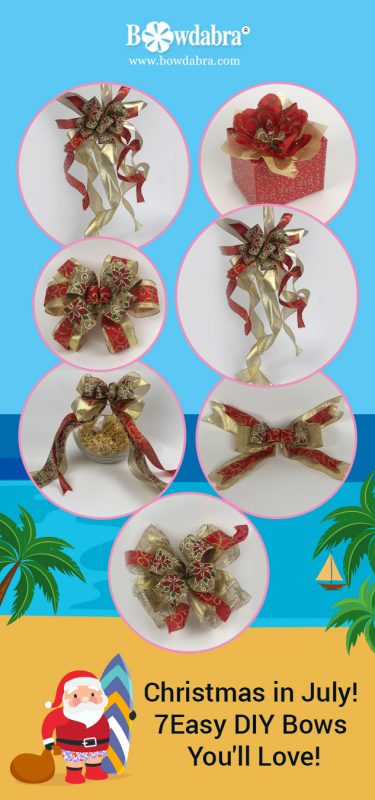
It’s celebration time! Christmas in July means it’s time to start decorating your home and gifts with designer décor items.You can create amazing DIY Bows in minutes with ribbon scraps and mesh on the Bowdabra, the world’s easiest bowmaker. Watch Sandy Sandler, the creator of Bowdabra create gorgeous and super simple Christmas in July-themed bows for home and gift wrap decoration.
* Printed ribbons (dovetailed)
* Mesh (dovetailed)
* Golden-edged ribbon
* Golden ribbon
* Printed burlap ribbon
* Bowdabra Bow Wire
* Large Bowdabra
* 7 designer Bow Kit
1. Sandy scrunches three beautifully dovetailed printed ribbons and mesh (33” long and 2.5” wide) into the Large Bowdabra.
2. Next, she tops it with another pretty ribbon with golden edges (20” long and 2.5” wide) making loops.
3. Scrunching a golden ribbon (27” long) making loops, Sandy tops it with a pretty printed burlap ribbon (18” long), again making loops.
4. She separates the ends and loops and ties it all together to finish the super simple and beautiful Christmas in July bow that can serve as home décor bow, wreath bow, or centerpiece bow.
* Golden ribbons (dovetailed)
* Golden mesh
* Bowdabra Bow Wire
* Large Bowdabra
* 7 designer Bow Kit
1. Sandy scrunches a pretty dovetailed golden ribbon (35” long and 2.5” wide) in the Large Bowdabra.
2. She tops it with a golden mesh ribbon (20” long) and two printed dovetailed burlap ribbons (20” long and 2.5” wide), making loops with the topmost one.
3. She scrunches a mesh ribbon (26” long) making loops and adds another piece of golden ribbon (23” long) over it, again making loops.
4. Once the bows are tied up with the Bowdabra Bow Wire, Sandy spreads the tails and the loops to finish the really pretty Christmas tree bow.
* Golden ribbons (point-ended)
* Red printed ribbons (curve-ended)
* Bowdabra Bow Wire
* Large Bowdabra
* 7 designer Bow Kit
1. Sandy scrunches in some golden ribbons (8” long) that have been cut with pointed ends along with a few red printed ribbons (6” long) that have their ends cut in curved shape.
2. Next she adds a dovetailed printed ribbon (3.5” long).
3. She ties up the ribbons and spreads them out to finish the easy to make gift wrap bow.
* Printed ribbons
* Golden ribbon
* Red printed ribbons
* Bowdabra Bow Wire
* Large Bowdabra
* 7 designer Bow Kit
1. Sandy begins by scrunching a printed ribbon (1 and 5 ace of a yard long and 2.5” wide) in the Large Bowdabra.
2. She tops it with another beautifully printed ribbon (50” long and 2.5” wide). To make the tails curly, she wraps the ribbons around her hands to make them curly.
3. Next, she adds some golden ribbons over it and tops it with few red printed ribbons (14” long and 1.5” wide each).
4. She scrunches another beautifully printed ribbon (1 yard and 25” long) making loops.
5. Tying it all, she shapes the loops and ends to finish the absolutely beautiful bow.
* Printed ribbons
* Red ribbon
* Bowdabra Bow Wire
* Large Bowdabra
* 7 designer Bow Kit
1. Sandy scrunches in two printed ribbons (2 yards and 12” long) into the Large Bowdabra, making loops.
2. Next, she tops it with another pretty ribbon making loops with twist and turn method.
3. Finally, she adds a red ribbon over it all making loops.
4. She ties all the ribbons to finish the gorgeous holiday party bow.
* Shop for 7 designer Bow Kit here
* Mesh ribbons
* Golden ribbon
* Red printed ribbons
* Bowdabra Bow Wire
* Large Bowdabra
* 7 designer Bow Kit
1. First, Sandy scrunches two beautiful mesh ribbons (47” long and 5” wide) in the Large Bowdabra making loops.
2. She tops it with three golden ribbons (12” long and 2.5 wide each).
3. Adding another two red printed ribbons over it, she adds another gorgeously beautiful printed ribbon (14” long and 2.5” wide) that she scrunches in, making loops in an X-manner.
4. In the last step, Sandy ties all the ribbons and finishes the beautiful centerpiece bow.
* Golden ribbon
* Red ribbons
* Printed ribbon
* Bowdabra Bow Wire
* Large Bowdabra
* 7 designer Bow Kit
1. Sandy scrunches two golden pieces of ribbon (19” long and 2.5” wide each).
2. She adds a red ribbon tail (15” long and 1.5” wide) over it and adds another golden ribbon (25” long) over it making loops.
3. She tops it with a printed ribbon (18” long and 2.5” wide), again making loops.
4. Repeating the process, she adds another red printed ribbon (12” long and 1.5” wide) making loops for a third time.
5. Sandy ties it all to finish the cute little garland/wreath bow.

4 thoughts on “Christmas in July! 7 Easy DIY Bows You’ll Love!”