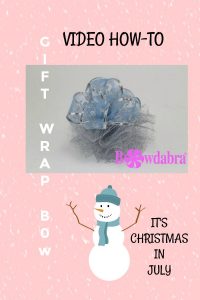
Wow! In this quick and easy video, you will learn how to make a stunning silver and blue gift-wrap bow in minutes. Your Christmas packages will become an elegant gift in itself.
Sandy Sandler, the creator of the Bowdabra takes you through the simple steps to make this gorgeous silver and blue gift-wrap bow. So gather your supplies and follow along!

Materials
- Bowdabra
- 17in Bowdabra Bow Wire
- (1) 11/2in X 54in Blue Sheer w/ Silver Dots Wired Ribbon
- 6in X 1yd Silver Sparkle Mesh Ribbon
“Hi, I’m Sandy Sandler, the creator of the Bowdabra Bowmaker. And today, we’re going to make a really cute little gift-wrap bow that’s super simple and will impress all your friends. So, let’s get started.”
Stunning silver and blue gift-wrap bow
First, I’ve already wrapped this gift in this really pretty silver gift-wrap. Now, in order to put the bow on it, I’m going to take the right side of the ribbon just lay that down on my table. Then, I take the package and lay it on top of my ribbon. Now, I’m going to take my ribbon, and I’m going to fold it around here.
The trick is going to be that when I tie my knot, I want to make sure that the right side of my ribbon is going to come out with the tail so the right side shows. So, before I knot it, I’m going to twist it, bring it through here, and then this way. Both of my tails are the right side, so you see the right side of the ribbon.
Now, I’m going to put that aside and I’m going to grab my Bowdabra. I’m going to fold my Bowdabra Bow Wire in half and just lay it into my Bowdabra. And I’m going to just tuck the ends underneath so they stay out of my way.
Then, I’m going to take my silver mesh ribbon, and I’m just going to scrunch it into my Bowdabra, just right down the center, and just keep scrunching it. Next, I’m going to take my blue ribbon that matches what I already tied around my bow, and I’m going to take the right side up. I’m going to twist it and scrunch it down. Then I’m going to fold it back over and twist and scrunch it. And the reason that I twist is that I want to make sure that the wrong side of my ribbon is on the inside of my loop.
So, I’m going to just fold and twist and just keep doing that. I’m going to have a cute little puffy bow right on top of our package. And then the last time I fold it over, I’m not going to twist, because I want to keep the right side up.
Then, I’m going to take my wand and I’m just going to scrunch everything down into my Bowdabra. And take this up here and pull it through my slipknot. I’ll hold everything and pull it tight while it’s still in my Bowdabra. Finally, I pull it out, separate the ends and bring it around to the back. I’m going to just tie a knot and double-knot it.
I’m going to take leave my wire on here because that’s how we’re going to tie it onto the package. And I’m going to just scrunch this all out and put my bow around here and just kind of scrunch it all there. Now, you just kind of shape the bow by pulling it in opposite directions.
This ribbon is a wire edge ribbon. You can purchase both of these ribbons on our Bowdabra website. Now I’m just going to pull this, I’m just going to tie this onto the ribbon that I wrapped around my package. So, if you don’t want to tie a ribbon around your package, you can just glue the bow on, but I like having the ribbon. So, I’m just going to tie a knot. Now I’m going to get my scissors and just clip it here. And you have this adorable little package with a stunning gift-wrap bow.
Now also, please, if you’re watching on YouTube, please click the Subscribe button, and on Facebook, please follow us. Thanks so much for watching, and I’ll see you in our next video.”