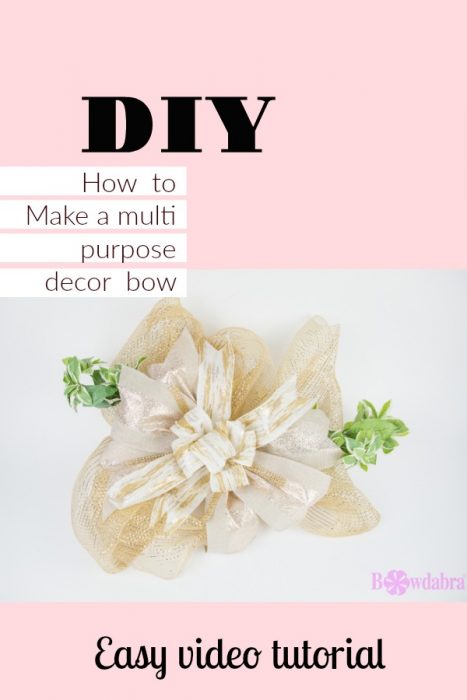
Watch and follow along with Bowdabra creator, Sandy Sandler as she shows you how to make a gorgeous multi-purpose décor bow. Use this amazing décor bow as a wreath, table centerpiece and so much more!

Multi-purpose décor bow
Materials:
20” x 104” Gold Mesh
(3) 5” x 19” Bowdabra Champagne Glitter Stripe Ribbon
(2) 2.5” x 17” Bowdabra Gold and Silver Splattered Ribbon
(3) 2.5” x 19” Bowdabra Gold and Silver Splattered Ribbon
1” x 12” Gold Bowdabra Rhinestone Me
(2) Leaf Floral Picks
So now, we’re going to make this beautiful décor bow that you could use as a centerpiece, home décor, a wreath bow, a wedding ornament. It can be used for anything. So, let’s get started.
First, I’m going to take my Bowdabra Bow Wire and I’m going to cut a piece, fold it in half, and I’m going to lay this down into my Bowdabra. Then, I’m just going to tuck the ends underneath, just so they stay out of the way. Now, I’m going to put this aside because I want to try to get everything out of the way here.
Add the mesh ribbon
I’m going to take my mesh ribbon and I’m just going to scrunch it down into my Bowdabra. Then, I’m going to fold it back. And as you guys know, working with mesh can be a pain. So, I’m just going to go back and forth with my mesh and just make four loops. I’ll scrunch that down. Now, I’m going to grab my Bowdabra Wand and give everything a scrunch. As you guys know, mesh just wants to pop up and go all over the place.
Add the greenery
Next, I have this great greenery, and I’m just going to lay this down into my Bowdabra, take this other one and just lay this going in the opposite direction. And then, I’m going to take this beautiful, sort of a burlap champagne ribbon with a gorgeous champagne glitter center. I’ve already dovetailed the ends, so I’m just going to fold it in half and just scrunch this down into my Bowdabra. Next, I’m going to do the same thing with the other one and just scrunch this down into my Bowdabra.
Now if you’re not sure how to do these dovetails that we have here, I’m going to fold it in half. Then you’re just going to take your scissors and cut at an angle towards the end, from the fold out to the ends. So now, I’m just going to fold this in half and scrunch that in. And because the mesh is popping up all over, I’m going to just take my wand and scrunch everything down into my Bowdabra.
Add gold and silver stripe ribbon
Next, I have beautiful gold and silver painted stripe ribbon. I want to grab the ones that are already pre-dovetailed. So, I’m going to take this in, and I’m just going to find the middle and just lay that down into my Bowdabra. Then I’m going to, again, with this piece, and find the center and lay that down into my Bowdabra.
Now, I’m going to take this piece here and I’m just going to take the right side of the ribbon and put it upside-down into my Bowdabra. Then I’m going to make a loop. I’m going to take the right side and scrunch that into my Bowdabra, so that way, the right side is up and in my loop.
And again, I’m just going to take my wand and scrunch everything down. Then, I’m going to take these pieces of our Bowdabra Rhinestone Mesh that we just cut in rows of three. And I’m going to lay these down into my Bowdabra. I have two more pieces here, and I’m going to take one here and I’m just going to do the same thing.
Continue making loops
When I make this loop, I’m going to take the right side of my ribbon, put it upside-down and scrunch that down. Then I’m going to bring it around and make a loop. The right side of the ribbon is going to go down. So now, I have this loop, and I’ll just go to the center and scrunch it in. And I need to just add a little bit more scrunch there. I’ll take my last loop and the right side goes down. Make a loop and the right side’s going to go down. And then I’m just going to scrunch this all down. (What’s nice about this is if you just precut everything it takes you literally no time to make this bow. And it’s so beautiful when you make it.)
Finishing your multi-purpose décor bow
Finally, I’m just going to pull my wire through my slipknot, hold my bow tight while the bow is still in the Bowdabra. Then, I’m going to pull it out of the Bowdabra. I separate the ends of my wire and pull it really tight. I’ll bring it around to the back and I’m going to tie a knot here and then, tie another knot.
Now I could tie this multi-purpose décor bow onto a wreath or a door hanger, so I’ll just leave my tails, my ribbon wire, not cutting the ends. And then you just shape your loops and just kind of shape everything, just put your fingers into the loops. Again, this is a wired ribbon, which makes it very easy to shape. And I’m just going to bring these out. And this could very easily go on a table, you could put candles around it, or it makes a beautiful door wreath. So, here you have it, and how super simple was that?
Please do me a favor and click the Subscribe button below, and also, like us at Bowdabra on Facebook.”