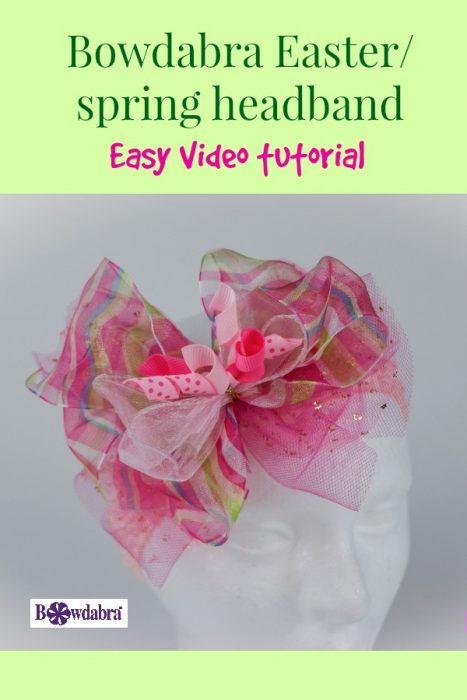
Join Sandy Sandler, the creator of the Bowdabra as she shows you how to easily make this charming Easter/spring headband for your favorite little girl.
This adorable headband is so easy and quick to make for a last minute dress up this Easter. And the best part is that you can wear it throughout the entire spring season to brighten the day! Spring showers, no problem with this cheerful little headband!
Bowdabra Easter/spring headband

Materials:
- Mini Bowdabra
- 18″ Gold Bowdabra Wire
- Bowdabra Hair Bow Tool and Ruler
- 15″ x 2.5″ Sheer Pink Ribbon
- 26″ x 2.5″ Sheer Striped Ribbon
- 14″ x 6″ Magenta Tulle
- 14″ x 6″ Pink and Gold Dot Tulle
- (3) Corker Ribbons
- Soft Headband
Join me as I make this really cute Easter/spring headband for a little girl. I’m going to start by folding my Bowdabra Bow Wire in half and laying it into my Mini Bowdabra. Then I tuck it underneath. I also have the Hair Bow Tool here so that I can measure.
The first thing that I’m going to do is I have two pieces of tulle, one with the gold glitter, and another piece is just plain. I like the dimension it’s going to give me. So, I’m just going to scrunch that in. I’ll keep it centered and just scrunch it into my Mini Bowdabra. Next, I’m going to take my wand and I’m just going to push everything down.
Now, I’m going to take this really pretty pink ribbon, and this is my right side, so I’m going to start here and twist, and I’m going to fold it back and twist, and then fold it back over. And I’m keeping this at about 5 centimeters, so I’m going to keep it at 5 centimeters on this side as well.
I’m going to twist, and I’m just going to fold it back, and I’m going to make it a little bit smaller. So it’s probably about 4 1/2 centimeters and then fold this one back here. Then, I’m just going to scrunch everything in. I take my Bowdabra wand again and scrunch it down.
Continue adding ribbon
Now I’ve already dovetailed this end, and I want this to just come down like that. I think it will be really pretty. Then I’m going to come here, and this time, I’m just going to make it like I’d make a regular little hair bow, and I’m just going to make it a little bit smaller. So, these are about 3 1/2 centimeters. And I’m going to fold this back over here. And I’m actually going to clip this piece. Okay, so I’m going to put this down in here and fold it over and tuck that in. Now, I’m going to make sure that I’m even here. So, I’ve got 3, a little over 3 centimeters on each side. I’m just going to scrunch that down in. And because this bow’s pretty big for the Mini Bowdabra, I’m just going to scrunch everything in.
Then I’m going to take my cute little corker ribbon. (Lay in Corker Ribbon) And again, I’m going to scrunch this down into the Mini Bowdabra.
Finishing your headband
I’m going to bring the ends of my bow wire through my slipknot. Next, I’m going to hold my bow down and I’m going to pull really, really tight while it’s still in the Mini Bowdabra. I’m going to take it out, separate the ends, and bring it around to the back. (Tie, double knot, and shape the bow)
Finally, I’m going to take my headband and I’m going to find where my seam is. And I’m going to just bring one of the wires right on this side of the seam, and then I’m going to bring it back through right on the other side of the seam. And then I’m going to bring it up to my bow. I’m just going to tie this here. (Tie and double knot the bow onto the headband. Then, clip the ends)
You have this really adorable, and easy to make Easter/spring headband!
Please do me a favor and click the Subscribe button below, and also, like us at Bowdabra on Facebook.”
SaveSave