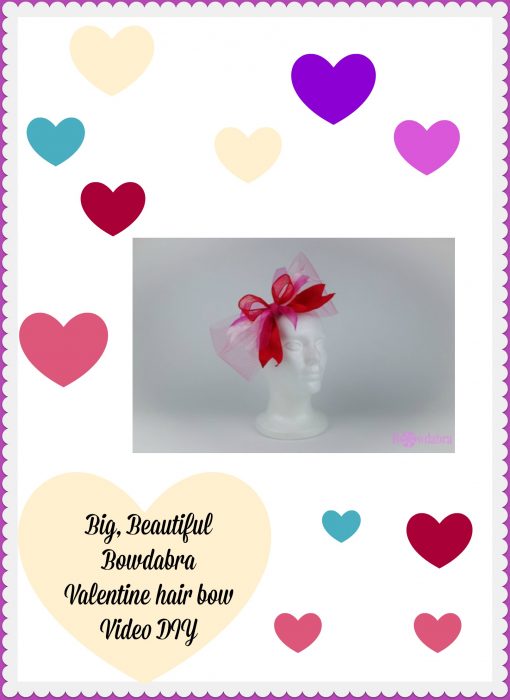
Watch as Sandy Sandler, the creator of the Bowdabra shows you how to make this big, beautiful Bowdabra Valentine hair bow. It is such an elegant large bow and is sure to make an impression wherever you wear it. The colors of this beautiful Bowdabra Valentine hair bow are soft and pretty, perfect for Valentine’s Day but don’t let that stop you from wearing it all year long.

Big beautiful Bowdabra Valentine hair bow
Materials:
- Bowdabra
- 24″ Silver Bowdabra Wire
- 6″ x 30″ Pink Tulle
- 2″ x 9.5″ Red Grosgrain Ribbon
- 3″ x 9″ Sheer Pink Wired Ribbon
- 1.5″ x 8″ Pink Polka-Dot Satin Ribbon
- 1.5″ x 10″ Sheer Red Glitter Ribbon
- (3) 5/8″ x 8″ Sheer Magenta Ribbon
- Alligator Hair Clip
“We’re going to use our large Bowdabra bow maker for this bow. And we’re going to make a really big beautiful Bowdabra Valentine hair bow. So, just in case you’re not familiar with the Bowdabra, underneath here, there are springs. And, it’s going to automatically adjust as I make my bow.
So, the first thing that I’m going to do is take my Bowdabra Bow Wire. I fold it in half, and I’m going to lay it down through the towers on my Bowdabra. Then, I’m going to just tuck the ends underneath to keep them out of the way while I’m making my bow.
Begin your bow
Now I have this really pretty glitter ribbon. And the first thing that I’m going to do, I’m putting it in wrong. This is the right side of the ribbon and I’m actually going to put the right side of the ribbon down. I’m just going to scrunch that down into my Bowdabra.
Next, I’m going to make a loop, and I’m basically measuring this about the size of my hand. So now, I’m going to fold this down and I’m going to come back here. And I have a little tail here, but you’ll see why that’s important later. Now what I take some ribbon, now here’s a pretty red ribbon, and I’m just going to scrunch that down here. I’ve already dovetailed my ends. (In order to dovetail, all I’m going to do is go diagonally towards the fold. And now you have this really pretty dovetail) So, I’m going to stick this down in here, and I’ve dovetailed all the other ones.
Continue adding the ribbon
So now, I’m going to take my pink ribbon, I’m making this bow with Valentine’s Day in mind, but this is a bow that you could use anytime. Now I’m going to take these and just put them in diagonally because I want them to kind of be like little tails sticking out and put that here.
And now this one, I cut as a point. So, I’m going to just put this here. (And I’m going to do the opposite from dovetailing. I’m going to cut from the fold diagonally to the two ends, so now I have a point.) Next, I’m going to just put this in across.
Finishing your bow
Now the last thing I’m going to do is make a little bow. So, all I’m going to do for this is I’m going to just put this down into my Bowdabra. Then I’m going to fold back here and just take another little piece of the end and put that into my Bowdabra. Now I have the middle, and again, I’m just going to do this little, tiny mountain in the middle and scrunch that down. Then, I’m just going to scrunch everything down into my Bowdabra.
The next thing I’m going to do is take my wire, and the reason I folded it in half is now I have a slipknot. So, I’m going to just pull that really, really tight while it’s still in the Bowdabra. I’m going to separate the ends, bring it around to the back and I’m going to tie a knot.
To finish, what I’m going to do and the reason that I left this long piece here is I’m going to wrap it around twice, bring it to the back. Now you could use a glue dot to hold it, but I’m actually just going to take my wire and tie a knot here.
Add the hair clip
I’m going to now take my hair clip and I’m going to put it in with the back down, because we know that’s going to have to go through the hair, and I’m just going to wrap it around here and here. Let me do that a couple times. I’ll do the same thing with this, and tie a knot. And if you want to be really super sure that it stays, just put a little glue dot underneath where the wire is. That gives it a little extra protection to make sure that it stays the way you want it. I clip that, and I’m going to clip this end here. And now you have a really, really adorable bow. Just shape these up here, and shape the bow out a little bit, and isn’t that cute?
Please do me a favor and click the Subscribe button below, and also, like us at Bowdabra on Facebook.”
Visit Bowdabra blog each week for more videos and DIY’s like this one. And join Sandy each Monday on Facebook live at 4:00 p.m. PST/7:00 p.m. EST.