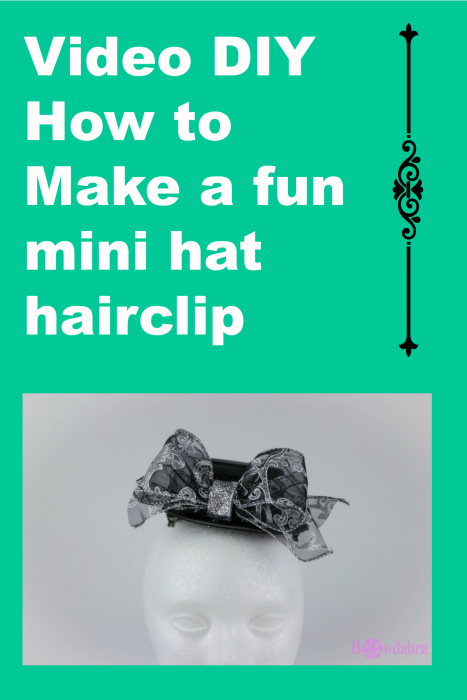
Looking for a fun little hair ornament that is unique and just plain adorable? Well watch this quick and easy video and make your own mini hat hair clip.
You will get complements galore when you wear this adorable little mini hat hair clip. Make one for yourself and one to give away. Change the color ribbon on the mini hat hair clip to fit just about any season or event! This project is easy and so much fun! So lets get started!
Materials:
- Mini Bowdabra
- 24″ Silver Bowdabra Wire
- 2 1/2″ x 24″ Wired Tuxedo Ribbon
- 1″ x 5″ Silver Glitter Ribbon
- 2 Alligator Clips
- 2 Strips of Black Felt
- Mini Hat from Claire’s
- Glue Gun or Glue Dots
- ScissorsMini hat hair clip video tutorial
Mini hat hair clip video tutorial

Today we’re going to make a really cute little bow for this hat, which we’ll turn into a hair clip. We’re going to use the Mini Bowdabra. How the Mini Bowdabra works is underneath here, there are springs. And it automatically adjusts to whatever you put into the Mini Bowdabra. It’s like having a third hand!
This is our Hair Bow Tool and Ruler, and I’m just going to slip it over my Mini Bowdabra. And it’s still going to work, but this way, we have measurements.
So, the first thing I’m going to do is take our Bowdabra Bow Wire and fold it in half. Then, I lay it into the Bowdabra, and I’m just going to tuck the ends underneath to keep them out of the way.
Make the dovetails
Next, what I’m going to do, and I’ve already done it, but just in case, I want to show you how I dovetail the ends. It gives to it such a pretty finish. So, what you do is fold your ribbon in half, and you’re just going to cut diagonally towards the fold. That’s what gives you your really cool finished ends.
Now, what I’m going to do is take my ribbon, and I’m just going to put a little crease in the middle. We call that our mountain-up fold. And I’m just going to stick that down into the Bowdabra. And you can see, it’s even inside.
The next thing I’m going to do is take one that’s just a little bit smaller and center it, and just scrunch that down into the middle. Then what I’m going to do is I’ve got this piece of ribbon, and I’m going to fold it in half, so I kind of know where my center is. And I’m going to start here and I’m going to put the wrong side down. I’m going to do the opposite. Then, I’m going to do what I call a mountain-down fold. I’m going to put that down into my Bowdabra and just scrunch that over.
Scrunch it down
Now I’m going to fold it back and do the same thing. And again, the wrong side is down. So I’m just going to scrunch that down into the Bowdabra. And I’m actually going to stick my wand through here and make sure everything’s scrunched down. You can see that the springs are adapting as I put the ribbon in. So now, I’m going to just measure. I have about 2 1/2 inches wide on that. So I’m going to just scrunch this down with my little like mountain there. And the reason that I do that is so that you have a crease. This is the reason why you don’t have to sew when you’re using the Bowdabra to make your hair bows.
Next, I’m just going to scrunch everything down. Now I’m going to take my bow wire, and the reason I folded it in half, because now I have a slipknot. So, I’m going to pull the ends through the loop and pull it tight while it’s still in the Mini Bowdabra. Then, I’m going to pull it out and take it to the side. I’m going to put my Mini Bowdabra aside. And I’m going to pull it tight here, bring it around to the back and tie a knot. That’s what’s so nice about the Bowdabra Bow Wire, is that you can tie real tightly with it. And I’m going to just clip the ends right here.
Finishing the bow
To finish, what I’m going to do is take this really pretty glitter ribbon, but it’s a little wider than I want. So, all I’m going to do is just fold it in half, and I’m going to start in the back and I’m just going to take a tiny bit of glue, put that right here. Bring it around to the front and take another dab of glue and glue that. I’m going to hold that kind of tight. Then, I’m going to clip the ends.
Then the next thing that I’m going to do is just shape my bow out. Next, I’ll take my little hat and put some glue here. (And if you look in the description below, we have we have a link to where you can actually purchase these little hats online) So, I’m just going to glue that on there. So, I have the clip here, and I’m going to just take a glue dot. I’ve already put one on. And take the glue dot here, I’m going to put this in like this and just put my glue dot here. That’s going to hold that down there. And now you can see, we have a really, really pretty little mini hat hair clip.
We’d love to hear your comments. Please visit Bowdabra blog each week as we bring you more tutorials, video DIY’s and more!
Please do me a favor and click the Subscribe button below, and also, like us at Bowdabra on Facebook.”