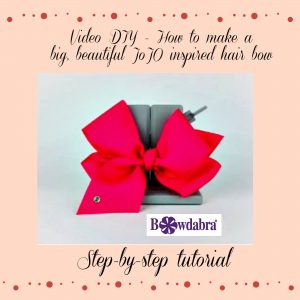
You can make this big, beautiful JoJo inspired hair bow quick and easy with the Bowdabra. Sandy Sandler, the creator of the Bowdabra shows you step-by-stop how to make a big, beautiful JoJo inspired hair bow in this DIY video. You will want to make one in every color and several to give away as gifts.
So gather your materials and let’s get started!
Materials:

JoJo inspired bows are all the rage. We have some grosgrain 2 1/2″ wide ribbon, and I’m going to start. I have my Mini Bowdabra hair bow tool and ruler plate, which lets me measure. We’re going to make this a 3″ bow, maybe a little bit more than 3″, in our Mini Bowdabra.
First, I’m going to take my Bowdabra Bow Wire. I’ve folded it in half, and I’m just going to lie that over the plate and tuck the ends under. So, the next thing that I’m going to do is I’m going to take my grosgrain and I’m going to measure out like right to the corner. And I’m going to twist and put that down into the Bowdabra.
Then next, I’m going to go back here, I’m going to fold it back, twist, and measure it to the end of the plate. That way it will be even on both sides. The next thing I’m going to do is exactly the same thing. I’m just going to twist it, make sure that it’s the right length here and put that down into the Mini Bowdabra.
Now, I’m going to take my wand, because this ribbon is very thick, and just make sure I have everything scrunched right in there. I’m going to do exactly the same thing. I’m going to fold it back and make sure that it’s even. Then, twist it and put it down into my Mini Bowdabra. I’m just pushing in with my hands to hold the ribbon in.
Now for this last loop I’m going to measure and make sure it goes to the edge of the Bowdabra Hair Bow Tool. And this time, I’m just going to make our mountain up crease and push that down. So now, we have the tail exactly where we want it in the JoJo bow.
I’m going to take my Mini Bowdabra wand and just scrunch everything down. I’m using the Mini Bowdabra but you can also do this in the regular. If you’re using the Mini, you’re going to have to pretty much push it down, because as I said, this ribbon is very thick. So, I’m going to pull the ends through my slipknot, holding my bow down while it’s still in the Mini Bowdabra. Then pull it really, really, really tight. Now pull it out and separate the ends, bring it around to the back and tie it.
And here I’m going to kind of shape my bow. I bring the loops the way that I need them. And before I finish shaping, what I want to do is take my ribbon here, and I’ve folded it in half, it’s the exact same ribbon. This is how we’re going to make the little knot that you always see on the front of the JoJo bow.
I’m just going to knot that. And then I’m going to just take a little glue and I’m going to glue that down there. Take a little bit more glue and just make sure that it’s glued really tight. So, once the glue is dried, then you just take your Bowdabra Bow Wire and tie it in a knot to the ponytail holder and then just clip the ends. I’ve already put Fray Check, or clear nail polish, so that the ends will stay.
And with the JoJo bow, on the front, we always put a little gem. So, I’m going to put my gem right there. And now you have a big, beautiful JoJo inspired hair bow that’s so simple to make in the Mini Bowdabra.
You can make all sorts of hair bows with Bowdabra, check out this video DIY for a fun figure eight loopy hair bow!
Please do me a favor and click the Subscribe button below, and also, like us at Bowdabra on Facebook.”