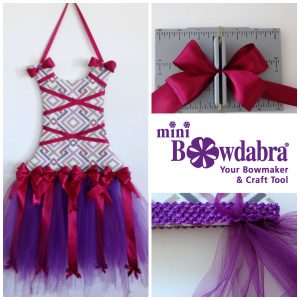
March is National Craft Month and to kick off the celebration I’m showing you how to make an adorable tulle dress bow holder. It’s something every girl should have to store her growing collection of hair bows. The tulle bow holder looks like a beautiful fancy dress. It has a padded bodice that’s crossed with ribbon where you can add lots and lots of hair bows, bow clips and headbands. And there are streams of ribbon that hang down the front of the tulle skirt where more bows can be attached. And best of all, Bowdabra bows are added at the waist and shoulder to highlight and compliment the design. What a decorator’s delight for a little girl’s room!

To make this bow holder, you will need:
Bodice pattern, craft paper (24″x20″)
Foam Board
Scissors/craft knife
Fabric
Fabric glue or hot glue
Batting
Tulle – two 25yd rolls
Ribbon – 3/8″, 1.5″ – 6+ yds.
Crochet elastic ribbon
Mini Bowdabra, Bow Wire, Wand
Tulle Dress Bow Holder
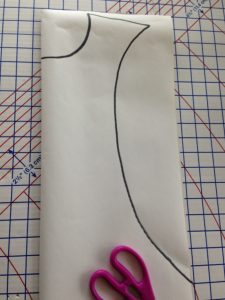
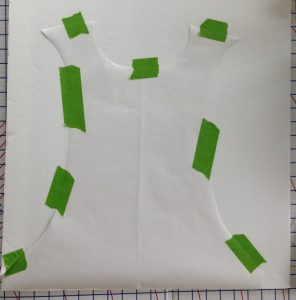
Begin my making a template for the bodice by folding craft paper in half and drawing a partial, simple bodice hourglass shape and cut out.

Next, trace the pattern onto foam board and cut out.

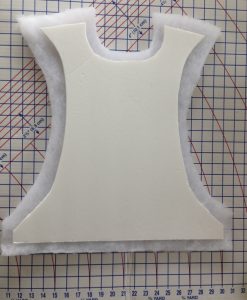
Then cut out the batting around the bodice foam board leaving an extra inch all the way around.

Next, cut out two fabric bodices, one an inch larger than the board and the other, slightly smaller to glue on the back. Then glue on the batting around the foam board. Cut slits on the edges of the fabric around the bodice curves so that it easily fits when gluing. Glue on the fabric over the batting edges to the back, smoothing out to fit.
Next, glue on hanging ribbon at the shoulders. Lay 3/8″ ribbon across the bodice in a crisscross pattern and secure with hot glue on the back, adding more ribbon, as desired. Glue on the fabric backing for a finished look. *I changed the size and color of the hanging ribbon using the 3/8″ ribbon instead.
To add the tulle skirt, measure a piece of crochet elastic ribbon across and around the bottom of the bodice and glue on at the edge.
Cut out 36″ strips of tulle, fold in half and then push the loop through a hole in the elastic starting at one side. Feed end of tulle through loop, pulling tight to close. Repeat using alternate shades of tulle along the front width of elastic.
Fluff and straighten tulle.
Embellish Your Bow Holder
Cut five strips of 1.5″ ribbon and hot glue onto bottom edge of elastic, evenly spaced over the tulle edge.
Embellish the waistline with handmade Bowdabra Boutique Bows.
Here’s how:
Cut an 18″ Bowdabra Bow Wire, folding in half and placing into the Mini Bowdabra. For tails, crease the center of a 15″ ribbon and insert. For a 6″ wide bow, crease a 24″ ribbon in the middle and place into the Mini Bowdabra. Grab the end of one side of the ribbon and place into the Mini Bowdabra, making a loop over the tower.
Grab the other end of ribbon over the first loop and down into the Mini Bowdabra forming an X over the tower.
Starting with the bottom loop, make a center crease and press into the Mini Bowdabra.
Then make a crease in the center of the top loop, down into the Mini Bowdabra.
Scrunch down the ribbon with the Mini Bowdabra wand. While the bow is still in, thread the ends of the bow wire into the loop, pulling tightly and gently pulling the bow out,
taking the wire around to the back of the bow and knotting twice, Cut off excess wire.
Make three more bows, dovetail the ends and glue onto waist. Add smaller Bowdabra bows to the end of the ribbon streams and . . .
larger ones onto each shoulder . . .
for an absolutely adorable bow holder!
If you would like to see more of Bowdabra designer Gail’s awesome craft tutorials please visit her blog, Purple Hues and Me, pinterest, Facebook.