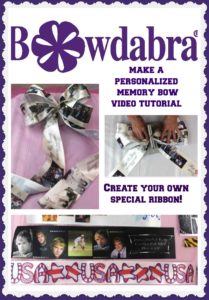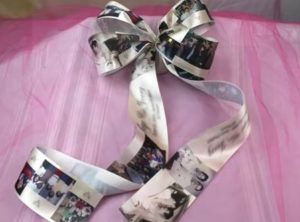
Watch Sandy in this amazing DIY video as she makes a personalized ribbon memory bow. You can design your own, one of kind ribbon, just ask us how. It’s perfect for wedding, births, anniversaries, graduation, holidays, and so much more! This ribbon is amazing and so much fun to work with!!!
I’m really excited with this new ribbon that I found. And we will actually be carrying it and customize for it you with whatever event you want. This one is for 50-year anniversary, and it’s a beautiful satin ribbon. All of the photographs are on it. So I’m going to make a bow with it. Because they’re photographs, I didn’t want to dovetail the ribbon. So I just cut it straight and sealed it with a lighter. So these are my tails.
Now, the first thing that I’m going to do is take my Bowdabra, fold my Bowdabra Bow Wire in half and lay it down into the Bowdabra. To keep it out of the way, I just kind of tuck it under. Now, because these are photos, I want the photos to be in a direction where you can see them. So I’m just going to take my ribbon and just scrunch it here, and that’s my first tail.
And the reason that I didn’t do these tails together is I want the ribbon going into a direction where you can see all the pictures. So I’m just going to scrunch. I’m using the mountain up crease. And then I just push it down into the Bowdabra. Because I want the photos going in the direction of the bow, the first thing that I’m going to do is fold this over. And actually, I did not seal this end, so we’ll do that very quickly. And I’m going to just do my mountain up crease here and scrunch it down. Being satin ribbon, it’s very slippery and it just kind of moves everywhere. So now I’m going to just make these approximately 8 inches, and I’m going to fold it over so I have about 8 inches on this side.
And I’m just going to, again, make my crease. And then what I’m going to do is fold, with the same size loop, fold it over this way, and I’m going to bring it through here so that we keep – and so now I’m going to have my 8 inches, and scrunch that down in there. Then what I’m going to do is take – so you have right here, you have a cross, but all the pictures are going the same direction.
So I’ll take my bottom ribbon and scrunch that down, and do the same with my top ribbon. So now everything goes in exactly the same direction, so you can see their names and the years. And then now I take my Bowdabra Wand and just scrunch that all down here. Take my wire and pull it through the slipknot.
Hold my bow down. Pull it really tight while it’s still in the Bowdabra. Separate my ends. Bring it around to the back. And this ribbon is so wonderful. I’m going to now just tie it off and knot it. But the ribbon’s so wonderful because you can get it in all kinds of designs. You can even design your own pattern. So you can do patterns like here, we have the hexagon. We have this first-year birthday, and a graduation. And you can – it’s really just so awesome to be able to make your own personalized ribbon memory bow.

Be sure and visit and subscribe to Bowdabra youtube channel for more awesome video tutorials like the personalized ribbon memory bow!
8 thoughts on “Make quick and easy personalized ribbon memory bow”