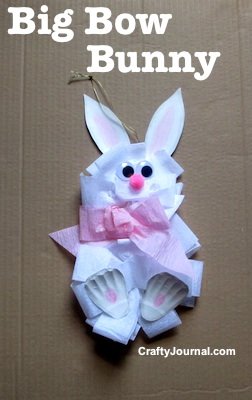
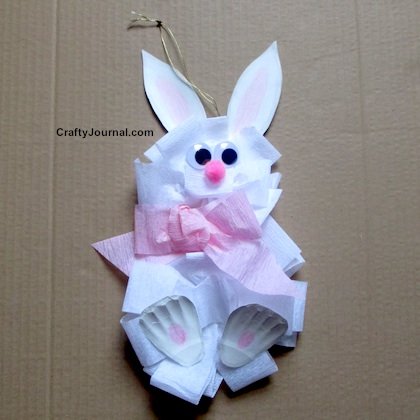
Create a Big Bow Bunny to hang for Easter. The Big Bow Bunny is a super fun kid’s craft! So grab the kids and make some Easter decorations quick and easy.
She’s fun and easy to make using 2 big bows.
And you could also make your bunny pink or blue instead.
Supplies.
White and Pink Crepe Paper Streamers, or Ribbon
2 Paper Plates
Wiggly Eyes
Small Pink Pompom
Crayons or Markers
Bowdabra Bow Maker
Scissors
Stapler
Hot Glue or Tacky Glue
How to Make a Big Bow Bunny.
First, make the bows.
1. Cut a piece of Bowdabra bow wire 24 inches long and fold it in half.
Lay it in the middle of the long slit, tucking the loop under one side and the ends under the other side.
2. Lay one end of the crepe paper through the short slit as shown.
3. Loop the crepe paper on the right side and put it back through the slit, leaving about a 3 inch loop.
My bunny’s body is about 6 1/2 inches wide, so one loop would be about 3 inches long.
4. Make a loop on the left side and put the crepe paper ribbon back through the short slit. This loop should also be about 3 inches.
5. Loop the crepe paper on the right side so it is about the same size as the previous one and put the ribbon back through the slit to the left side.
6. Continue making loops this way until you have about 7 loops on each side.
7. Finish the bow with a small loop on one side.
8. Use the Bowdabra wand to press down the center of the bow.
9. Pull up the ends of the Bowdabra wire and put them through the wire loop at the other end.
Pull it tight.
10. Gently pull the bow up off the Bowdabra, wrap 1 wire around each way on the bow and tie it firmly in the back.
11. Repeat with the other bow, making it about 5 inches across.
Each loop on the smaller bow would be about 2 1/4 inches long.
Make 5 or 6 loops on each side for this bow, and tie off the same way as the first bow.
How to Put the Big Bow Bunny Together.
1. Cut circles out of the centers of 2 paper plates that are slightly smaller than the 2 bows.
2. Punch 2 tiny holes in the center of each circle about 1/4 of an inch apart.
Thread the wires on the back of one bow through the two holes and tie a knot behind the circle.
Repeat with the second bow and circle.
Fluff up the loops on the bows.
3. Use a paper plate to draw bunny ears on, and cut them out.
Color the inside of the ears pink.
Shade the edges of the ears gray with pencil or crayon.
4. Draw 2 bunny feet on the edge of the paper plate you cut off the circle, using the ridges for toes.
Cut them out.
Shade the edges of the feet with gray and add a pink oval to the middle.
Draw lines between the toes.
5. Staple the head plate to the top of the body plate. I stapled it in 2 places for sturdiness. Make sure the staples are under the loops.
6. Staple the ears to the back of the head, making sure the staples are under the loops of the bow.
7. Tie a ribbon around the bunny’s neck and make a bow in front.
Or you could just make a bow and attach it to the front of the bunny.
8. Add 2 big wiggly eyes and a pink pompom nose for the face.
9. Attach the feet to the bottom front of the bunny’s body, angling the toes toward the outside of the body.
10. Pull the wires behind the head up and tie a knot at the end for hanging.
If the bunny doesn’t hang straight, tape the wire to the back of the head near the top.
11. Cut off the wires behind the bunny’s body, leaving short ends.
Tips.
White card stock can be used instead of paper plates, but the plate ridges do make cute bunny toes.
by Noreen Doll
Do you have the Bowdabra® Bow Making & Design Tool – Large – BOW1003 to make a Big Bow Bunny?


