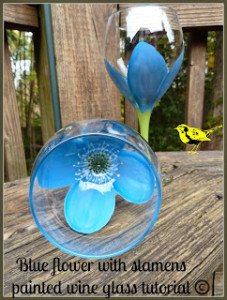
It’s really quite easy to paint a wine glass. The paint is available at just about every craft store and online and this step-by-step tutorial takes you through the entire process. These wine glasses are extra special because when you look inside the glass you will see the interior of the flower!
The paint dries quickly so it’s a great last minute hostess or birthday gift. Bake your glasses (No they won’t melt) to make them top rack dishwasher safe although I would recommend hand washing. A great gift to pair with a nice bottle of wine!
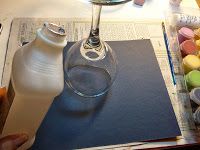
Materials:
· Gloss acrylic paint (it will say it can be used for glass on the label) Lt. Blue, Med blue Dark blue, Yellow, white, brown, and green
· Wine glasses
· Alcohol
· Paper towels
· Small liner brush
· Small flat brush
· Cotton swab or toothpick
· Home oven and cookie sheet
1. Wash and dry the wine glasses. Wipe down the glasses with alcohol to remove any residue, oils and finger marks.
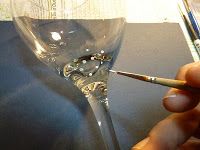
2. Turn your wine glass upside down and work on the bottom outside of the bowl. Using the liner brush make small dots around the bowl with white. Work around about two inches up from the bowl bottom. Rinse out your brush and begin adding small dots of yellow under the white dots you added continuing to add dots on the upper stem area. Let dry. You will be layering colors so you will need to let the paint dry between layers.
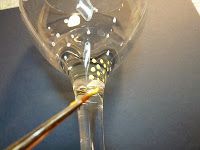
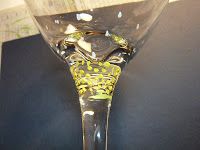
3. Rinse your brush. Use the white paint to make thin lines from each white dot to the underside of the wine glass right up to the stem. (See photo) Add some dots with brown paint for contrast in between the yellow dots. This is the inside of your flower and when you are finsihed you will not see it from the outside of the glass. Let dry. You can look inside the wine glass to visualize how your flower interior is coming out.
4. Use the flat brush sideways to mark four petals with the medium blue paint. Start the petals all the way from the upper stem to cover the flower interior. (Dots and lines) Work on filling in each petal one at a time. As you fill them in and while the paint is still wet, outline the edges in dark blue and blend into the med blue. Add a bit of lt. blue in the center of each petal and blend as you did with the dark blue. Let each petal dry and then repeat for a second coat. Depending upon your brand of paint you may have to repeat for a third coat. Let dry.
5. When the paint is completely dry use the green paint to create leaf shapes slightly up the bowl over the area you have already painted and down the stem to the base. Repeat for a second and maybe third coat. Use the liner brush to add some curled vines on the base and let dry. (See photo)
6. When the paint is dry use a cotton swab with alcohol to remove any paint where you do not want it—or you can gently scrape off any unwanted paint with the tip of a toothpick.
7. Bake your wine glass. Place your painted wine glass on a cookie sheet and into a 350-degree oven for 30 minutes. Let cool in the oven. When it is done the wine glasses will be top rack dishwasher safe but I recommend hand washing.
To make a great gift just tie on a pretty Bowdabra Bow to the stem of the glasses. Follow the video tutorial to make your wine glass gifts extra special!
Note: If you make a mistake and are not pleased with how you wine glass is coming out– before you bake your wine glass you can always wash it off and start over.
Visit Designer Crystal at Make it easy crafts for more easy tutorials like the Blue flower painted wine glass!
