We love creating new crafts for every season. Our favorite type of crafts are patriotic crafts. The kids love finding new ways to decorate using red, white and blue!I Most of our patriotic crafts stay up all year long. One of our favorites is making a ribbon windsock. This is an easy kids craft which requires very little adult supervision.

Just grab some supplies and let them get as crafty and creative as they want. We’ve made many of these over the years and the kids love to take them to the grandparents, to nursing homes, or to school for their teacher. The giving is endless!
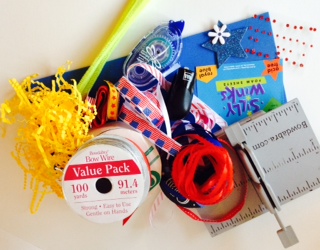
Materials Needed:
- Foam Sheet, any size
- Assorted Ribbon of various prints and colors
- Netted Tulle
- Pipe Cleaners
- Various embellishments – stars, flowers, sequins, etc
- Double sided tape runner
- Stapler
- Scissors
- Markers
- Mini Bowdabra w/Ruler
- Bowdabra Bow Wire
- Bowdabra Wand
Instructions:
1. Begin by gathering all the materials you will need to make this project. Let the kids go on a supply hunt in your home. Chances are you have all of these supplies on hand. We almost never buy anything new for this project.
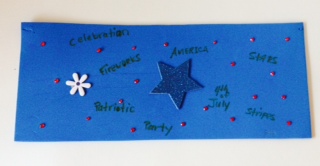
2. Depending on the size you want your windsock, cut out a large rectangle strip. Leave it on a flat surface and let the kids decorate. I do let them write on their windsock words which describe their project. For the 4th of July they wrote patriotic words such as American, freedom, fireworks, etc.
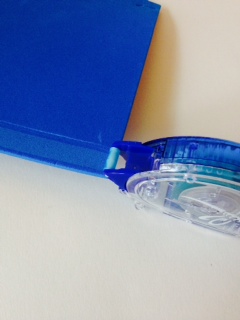
3. Once decorated, flip over. Use the double sided tape runner to lay out a strip of tape all along the bottom.
4. Let the kids attach their ribbon to the tape.
5. Once finished, roll up the windsock and staple the ends together. The kids might need help with this step. Attach 1 pipe cleaner by stapling on. This is how you hang up the windsock.
6. To make the bow place the Hair Bow Tool & Ruler onto the Mini Bowdabra. Cut 18? of Bowdabra Bow Wire and fold the wire in half. Place the wire into the Mini Bowdabra.
7. Make the bow any size that you want. Place the ribbon end into the Mini Bowdabra and fold and twist.
8. Continue to fold and twist the ribbon to form additional loops. Finish with a final ribbon tail. We did this with various colors and textures. Use the Bowdabra Wand to squish down the ribbon and tulle to add in more ribbon.
9. Top of the bow with strips of various sizes and colors of ribbon. Just find the middle of the ribbon and press down into the Mini Bowdabra. Do one final scrunch with the Bowdabra Wand.
10. Thread the two wire ends through the loop and pull tightly. If I have a lot of ribbon in the Mini Bowdabra I do use my hand to help hold the ribbon during this step.
11. Remove the bow and knot the back with a wire.
12. Use the wire to tie the bow to the windsock. We usually add it to the pipe cleaner handle or it can be added directly onto the windsock and be stapled on. Spiral the remaining with a pencil to create fun ringlets.
13. Hang up your windsock or give it as a gift this holiday season. Remember this is a project that can be made at anytime using any supplies. The kids love this super easy craft.


