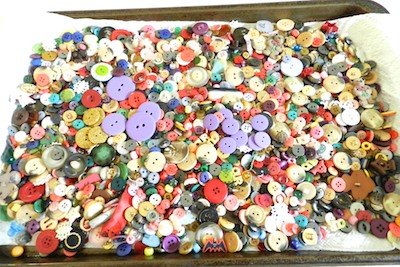
I have a huge assortment of buttons and my children love looking through them. I thought they would especially love sorting the buttons into like colors and creating a mosaic button picture frame.
This kids craft takes several steps to make, first sorting the buttons, brainstorming and planning the mosaic, a quick painting of the shapes, and lastly gluing the buttons.
Kids or mom can finish the frame with a beautiful Mini Bowdabra Bow.
Materials Needed:
- Unfinished Wooden Picture Frame
- Assorted Buttons
- Paints
- Aleene’s Tacky Glue
- Mini Bowdabra
- Hair Bow Tool & Ruler
- Bowdabra Bow Wire
- Coordinating 3/8″ Grosgrain Ribbon
Instructions:
1. Begin with a large collection of buttons. I placed my buttons on cookie sheet to make it easy for the kids to see them.
2. Kids should sort some like colors.
3. Once you have brainstormed your mosaic, begin to paint the frame. The painting should not be detailed, but rather just a background for the buttons.
4. Paint the entire frame and let it dry.
5. Once the paint is dry begin to glue the buttons on.
6. Cover the entire frame.
7. While the glue is drying make a bow for the frame. Place the Hair Bow Tool & Ruler onto the Mini Bowdabra. Cut 18″ of Bowdabra Bow Wire and fold it in half. Place the wire into the Mini Bowdabra. Gather four coordinating colors of 3/8″ wide grosgrain ribbon.
8. Place the ends of each ribbon into the Mini Bowdabra.
9. Fold the first two bottom ribbons at the 2″ mark.
10. Fold the next two ribbons.
11. Continue alternating the ribbon loops and fill the bow to the top of the towers. Cut the ribbon ends at the 2″ mark and scrunch down with the Mini Bowdabra Wand.
12. Place the wire ends through the loop.
13. Pull the wire tightly.
14. Bring the wire around to the back of the bow and knot tightly. Fluff the bow.
15. Glue or staple a ribbon strand to the picture frame. Attach the bow to the ribbon using the Bowdabra Bow Wire. Spiral the remaining wire.
16. Add a picture and the mosaic button picture frame is complete!

