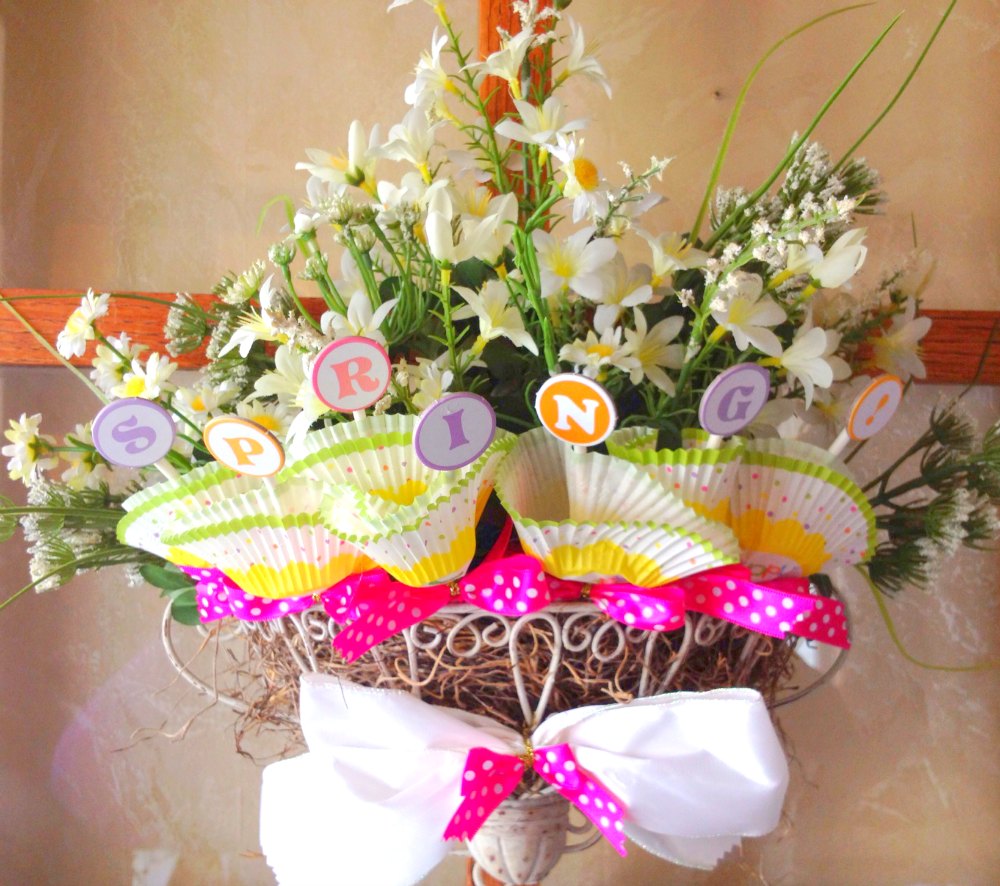
You can easily recreate this idea using a wreath that you already have around the house. Recycled projects are my favorite because they save money. I love to switch out dark flowers for lighter, spring colors and change the ribbon to match the season. Once I gathered my supplies, this was a 30 minute craft.
Materials Needed:
- Wreath already made or make a new wreath
- White Wire Ribbon
- Spring Hot Pink Polka Dot Ribbon
- Paper craft letters for SPRING!
- Spring Cupcake linkers
- Cake Pop Sticks or Popsicle Sticks
- Hot Glue Gun
- Mini Bowdabra
- Bowdabra Bow Wire
- Scissors
Instructions:
1. Get an already made wreath or create a new wreath to fit the season.
2. Hot glue letters to the craft sticks. Fold a cupcake liner in half and hot glue to the stick.
{Home Decor} Welcome Spring! Door Wreath
{Home Decor} Welcome Spring! Door Wreath
3. Use the Mini Bowdabra and Bowdabra Bow Wire to make the mini bow for the craft sticks.
4. Cut seven 10”³ of Bowdabra Bow Wire and fold one of the the wires in half. You will repeat these steps for each ribbon. Place the wire into the Mini Bowdabra.
{Home Decor} Welcome Spring! Door Wreath
5. Take 2 inches of the spring ribbon and add to the Mini Bowdabra. Give it a twist to keep the pattern facing upward and make a 1 inch loop.
{Home Decor} Welcome Spring! Door Wreath
6. Press the 1 inch of the ribbon into the Mini Bowdabra to form your first loop and do this on the other side. Only 1 loop is needed on each side.
{Home Decor} Welcome Spring! Door Wreath
7. Trim the opposite side tail to equal the length of the other side.
{Home Decor} Welcome Spring! Door Wreath
8. Thread the two loose ends of Bowdabra wire through the loop. Pull the wire tightly. Remove the bow for the Mini Bowdabra and bring the wire around the back and tie it tightly.
{Home Decor} Welcome Spring! Door Wreath
9. Trim off ends and hot glue it to the craft stick. Stick the craft sticks into your wreath.
10. Repeat the bow making steps to create the larger bow for the wreath. I just used the Mini Bowdabra since it is a small bow. If you have a a larger wreath, you will want to use the Bowdabra instead of the Mini Bowdabra to make the bow.
11. Before making the bow, I trimmed the ends using a new technique from the Bowdabra Facebook page. The technique is called Double Dovetail. Fold the ribbon in half like a normal dovetail. Fold the ribbon in half again. Then cut from the center fold at an angle to the sides. It just adds a little extra fun to your ribbon edge.
Decorative Ribbon Cut Double Dovetail
12. I had one extra polka dot bow so I added that on top of the white loops before tying off the Bowdabra wire (see step 8 above.)
{Home Decor} Welcome Spring! Door Wreath
{Home Decor} Welcome Spring! Door Wreath
12. Attach bow to wreath by
tying it with the Bowdabra wire or hot glue it to the wreath.
{Home Decor} Welcome Spring! Door Wreath