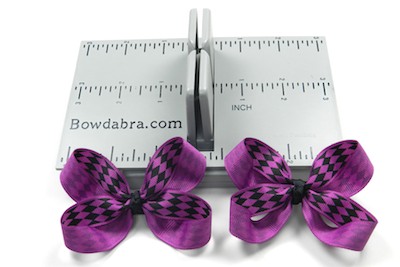
 The Bowdabra Hair Bow Making Kit includes both the Mini Bowdabra and the Hair Bow Tool & Ruler. The ruler comes with an Interactive CD for making a variety of hair bows, including the Twisted Boutique Bow. We invite you to view our free Twisted Boutique Bow tutorial using one-side printed grosgrain ribbon for free below:
1. Begin by placing the Hair Bow Tool & Ruler onto the Mini Bowdabra. Cut 18″ of Bowdabra Bow Wire and fold it in half and place it into the Mini Bowdabra.
2. We are making a 3″ wide bow so you will need 18″ of 5/8″ printed grosgrain. Fold the ribbon in half to create a crease at the center point. Place the ribbon (print sided down) at the center into the Mini Bowdabra.
3. Fold one side over the Mini Bowdabra towers and press the end of the ribbon into the Mini Bowdabra.
4. Fold the other side of the ribbon over and press the end into the Mini Bowdabra. The ribbon will form an “X” at the top of the Mini Bowdabra.
5. Fold the bottom ribbon loop over twice (away from your body) and press the ribbon into the Mini Bowdabra. The ribbon should be print side up and the loops will be very curly.
6. You can wait till the end when you fluff your bow or at this time you can uncurl the loops. Make sure to keep the ribbon in the center of the Mini Bowdabra print side up and then just untwist the loops. Please use the picture below for reference.
7. Now fold the top ribbon strand over twice (away from your body) and press into the Mini Bowdabra.
8. Now uncurl these last two loops. Make sure to keep the ribbon in the center of the Mini Bowdabra print side up and then just untwist the loops. Please use the picture below for reference.
9. Scrunch down with the Mini Bowdabra wand.
10. Thread the two end pieces of the Bowdabra Bow Wire through the loop.
11. Gently pull the bow out of the Mini Bowdabra. Separate the two loose ends of the Bowdabra Bow Wire and bring them around to the back of the bow and tie the wire tightly in the center of the bow.
12. Fluff the bow.
13. Attach the bow to a hair clip and add finishing ribbon. (When I took this photo the bow is actually upside down. Though, it really doesn’t matter I thought it was important to note for those trying to replicate the design. The photos below show the bow right side up.)
14. Follow the instructions to make a matching 3″ wide twisted boutique hair bow.
4 thoughts on “Hair Bow Making Kit Tutorial: Twisted Boutique Bow”