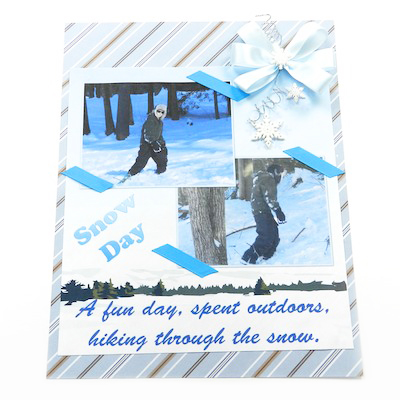
Make bows to add to your scrapbook layouts to bring dimension and interest to your page. The Mini Bowdabra and 
Here in the northeast we still have lots of snow on the ground. I placed photos of my son hiking in the snow and added ribbons, snowflake embellishments, and a Mini Bowdabra bow to my page layout.
Paper Crafting Supplies:
Scrapbooking Paper
Photos
Adhesive
Tacky Glue, Glue Stick and/or Hot Glue
Embellishments
5/8” wide satin ribbon (approx. 20” in length)
Mini Bowdabra
Hair Bow Tool & Ruler
Bowdabra Bow Wire
Instructions:
1. Begin with your scrapbooking page layout ”“ add photos and embellishments.
2. To make the bow – place the Hair Bow Tool & Ruler onto the Mini Bowdabra. Cut 18” of Bowdabra Bow Wire and fold it in half and put it into the Mini Bowdabra.
3. Place the end of the ribbon into the Mini Bowdabra.
4. Fold and press the ribbon into the Mini Bowdabra at the 1.5” mark.
5. Fold and press the ribbon on the other side at the 1.5” mark to create a matching loop.
6. Continue folding and pressing the ribbon into the Mini Bowdabra until you have a made a total of 6 loops.
7. Trim the ribbon from the spool and scrunch down with the Mini Bowdabra Wand.
8. While the bow is still in the Mini Bowdabra, thread the two loose ends of the Bowdabra Bow Wire through the loop at the other end.
9. Pull the wire tightly.
10. Gently pull the bow out of the Mini Bowdabra. Separate the two loose ends of the Bowdabra Bow Wire and bring them around to the back of the bow. To tie off the bow, pinch the Bowdabra Bow Wire securely against the bow. Twist the bow 4 to 6 times in a clockwise direction.
11. Hot Glue an embellishment to the fr
ont of the bow.
12. Wrap the remaining Bowdabra Bow Wire around a pencil to make fun ringlets. Hot glue the bow to the scrapbooking page.
13. Your scrapbook page is complete.
Looking for more paper crafting project ideas? Click here for over 32 paper crafting tutorials!