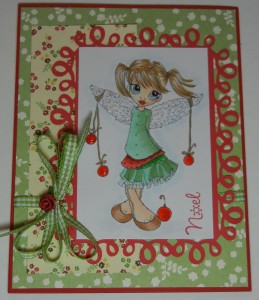
Materials:
- Saturated Canary ”“ Christmas Angel
- Cardstock ”“ Xpress It Blending Card; Stampin Up ”“ Really Red
- Designer Paper ”“ Stampin Up – Holly Berry Bouquet
- Sentiment ”“ My Favorite Things – Winter in the City
- Ink – Stampin Up – Real Red
- Flower ”“ Wang’s International, Inc.
- Ribbon ”“ green gingham – from my stash
- Loopy Mat – Cricut Cartridge – Elegant Edges
- Cricut Expression
- Copic Markers
- Mini Bowdabra
- Hair Bow Tool & Ruler
- Double-sided tape
- Glue dots
Instructions:
1. Begin by placing the Hair Bow Tool & Ruler onto the Mini Bowdabra.
2. Cut 18”³ strand of Bowdabra wire, fold it in half, place it into the Mini Bowdabra, and tuck the ends under.
3. Place your flower tightly into the slot of the Mini Bowdabra.
4. Place the green gingham ribbon on top of the flower in the slot of the Mini Bowdabra leaving a 2″ tail.
4. I wanted to make a bow with three, 1 1/4″ loops on either side, so I started on the right and folded the ribbon over to the left to make my first loop.
5. Next, I folded the ribbon from the left to the right to make another 1 1/4″ loop on the left side.
6. To make the three loops on either side, I continued to fold the ribbon back and forth two additional times in order to get the three loops.
7. Once I had my loops, I used the wand to scrunch down the loops in order to tie them off.
8. Next, I pulled up on each of the ends of the Bowdabra wire and tied a tight knot on the underside of the bow.
9. Then gently lift the bow from out of the Mini Bowdabra.
10. Now you’re ready to prepare the bow. First trim the ends of the Bowdabra wire leaving about 1/4″ length and trim the stem of the flower as close as you can leaving about 1/4″ of the stem to stabilize the flower.
11. Next trim the ends of the ribbon, turn the bow over, and add 2 small glue dots to the back of the ribbon over the Bowdabra wire tails.
12. Finally, adhere the bow to your card.
13. And your card is finished and ready to be addressed to someone for the holiday.