May is just around the corner which means that it will be Mother’s Day soon. Put on your creative hat and design a card for your mom or that special lady in your life.
Materials:
- Image- Just Emma And Sentiment- I Love You THIS Much from Fred She Said Digital Stamps
- Cardstock-Stampin Up Confetti Tan; XPress It Copic Blending Paper
- Designter Paper-Melissa Francis-C’est La Vie
- Michaels 1/8 inch and 1/2 inch blue polka dogs
- Metallic Corner- 7 Gypsies
- Mini Bowdabra
- Mini Bowdabra Hairbow Tool And Ruler
- Double-sided Tape
- Glue Dots
Instructions:
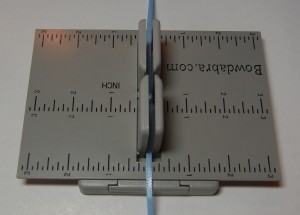
1. Begin by placing the Hair Bow Tool & Ruler onto the Mini Bowdabra. Take a 12″ length of the 1/8″ ribbon and place it into the Mini Bowdabra.
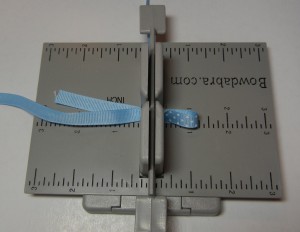
2. Place the 1/2 inch wide polka dot ribbon into the Mini Bowdabra with the wrong side facing you at the 2 1/2 inch mark.
3. Make a 1 1/4 inch long loop on the right side and twist the end of the loop before inserting it back into the Mini Bowdabra. The loop will have the right side of the ribbon facing and the free end will have the wrong side of the ribbon facing.
4. Make a 1 1/4 inch long loop on the left side and twist the end again before placing it in the Mini Bowdabra. Both lopps will have the right side of the ribbon visible and the ends will have the wrong side of the ribbon on top.
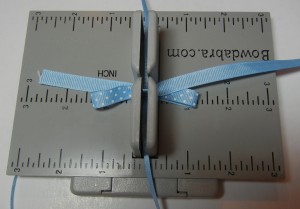
5. You will notice that the loops are a little at an angle. This is so that when you are finished with your bow, the loops won’t be on top of each other, but spread out a little bit. Make another 1 1/4 inch long loop on the right side, twisting the center before placing it into the Mini Bowdabra.
6. Once again, fold the ribbon on the left at the 1 1/4 inch mark and take it to the right side twisting it at the middle. All four loops will have the right side of the ribbon on top and the ends of the ribbon will have the wrong side facing up.
7. Now you have the number of loops you want and it’s time to finish off your bow. Gently scrunch the center of the bow with the Mini Bowdabra Wand.
8. Lift the wand out and take the two ends of your 1/8″ ribbon and bring them up to the top and tie off your bow. Gently pull your bow up and out of the Bowdabra.
9. Once your bow is out of the Bowdabra, you can trim off the 1/8″ tails close to the knot and also trim the ends of the bow tails at an angle.
10. Now your bow is all finished and ready to adhere to your card.


