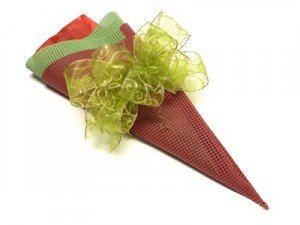
Today our Bowdabra Blog tutorial focuses on how to wrap kitchen gifts. Create a gift where the gift wrap can just be as useful as the gift! Kitchen shelf liner comes in a huge array of colors and you can buy large rolls of it for less than $3.00 a roll. I purchased red and green shelf liner to use as gift wrapping. The shelf lining is the perfect wrapping to create large holiday cones for long items like kitchen cooking utensils. Best of all after the gift recipient opens the gift she can cut and use the shelf liner in her kitchen along with the kitchen present.
Materials Needed:
Instructions:
1. Begin with two rolls of shelf liner.
2. Unroll some of the liner an fold it at the corner to cut out a cone shape.
3. Cut out the cone shape.
4. Place long kitchen utensils with tissue paper in the center of the kitchen liner.
5. Wrap the utensils in the tissue paper and place them in the center of the shelf liner. Place the shelf liner so that the inside liner is slightly higher than the outside liner.
6. Roll the liner into a cone shape.
7. Hold the liner in place with Christmas wire ribbon.
8. Finish the gift wrap with a large loopy bow. Cut 24? of Bowdabra Bow Wire and fold it in half. Place the Bowdabra Bow Wire into the Bowdabra.
9. Place the end of the wire ribbon “good side” down into the Bowdabra.
10. Fold and twist to create your first loop.
11. Continue folding and twisting the ribbon until you have created as many loops as you want. I made four large loops and then four smaller loops.
12. Scrunch down with the Bowdabra Bow Wand.
13. Then thread the two loose ends of the Bowdabra Bow Wire through the loop at the other end.
14. Pull the Bowdabra Bow Wire tightly while the bow is still in the Bowdabra.
15. Gently pull the bow out of the Bowdabra. Separate the two loose ends of the Bowdabra Bow Wire and bring them around to the back of the bow and knot. Fluff bow.
16. Tie the bow to the kitchen gift wrapping using the Bowdabra Bow Wire. Spiral the remaining wire with a pencil to create fun ringlets. Your gift is complete!
For more about the designer of this tutorial click here….